Source Code
<div class="wrap">
<div class="uploader">
<h2 class="heading">Upload Photos</h2>
<p class="sub">Add up to 12 images. Drag & drop or click to browse.</p>
<div class="dropzone" id="dropzone" onclick="triggerInput()" ondragover="onDragOver(event)" ondragleave="onDragLeave(event)" ondrop="onDrop(event)">
<svg width="36" height="36" viewBox="0 0 24 24" fill="none" stroke="#94a3b8" stroke-width="1.5"><path d="M21 15v4a2 2 0 0 1-2 2H5a2 2 0 0 1-2-2v-4"/><polyline points="17 8 12 3 7 8"/><line x1="12" y1="3" x2="12" y2="15"/></svg>
<p class="dz-text">Drop images here or <span class="dz-link">click to upload</span></p>
<p class="dz-hint">JPG, PNG, GIF, WebP — max 5MB each</p>
</div>
<input type="file" id="fileInput" accept="image/*" multiple style="display:none" onchange="onFilePick(event)">
<div class="grid" id="previewGrid"></div>
<div class="footer" id="footer" style="display:none">
<span id="fileCount">0 files selected</span>
<div class="footer-btns">
<button class="btn-clear" onclick="clearAll()">Clear All</button>
<button class="btn-upload" onclick="fakeUpload()">Upload Files</button>
</div>
</div>
</div>
</div>* { box-sizing: border-box; margin: 0; padding: 0; }
body { font-family: system-ui, sans-serif; background: #f8fafc; min-height: 100vh; display: flex; align-items: flex-start; justify-content: center; padding: 32px 20px; }
.wrap { width: 100%; max-width: 640px; }
.uploader { background: #fff; border-radius: 20px; box-shadow: 0 4px 24px rgba(0,0,0,0.07); padding: 28px; }
.heading { font-size: 18px; font-weight: 800; color: #0f172a; margin-bottom: 4px; }
.sub { font-size: 13px; color: #64748b; margin-bottom: 20px; }
.dropzone { border: 2px dashed #e2e8f0; border-radius: 16px; padding: 36px 20px; text-align: center; cursor: pointer; transition: all 0.2s; background: #fafafa; display: flex; flex-direction: column; align-items: center; }
.dropzone:hover, .dropzone.active { border-color: #6366f1; background: rgba(99,102,241,0.03); }
.dz-text { font-size: 14px; color: #475569; margin: 12px 0 6px; }
.dz-link { color: #6366f1; font-weight: 700; text-decoration: underline; }
.dz-hint { font-size: 12px; color: #94a3b8; }
.grid { display: grid; grid-template-columns: repeat(auto-fill, minmax(130px, 1fr)); gap: 10px; margin-top: 16px; }
.preview-card { position: relative; border-radius: 12px; overflow: hidden; aspect-ratio: 1; background: #f1f5f9; }
.preview-img { width: 100%; height: 100%; object-fit: cover; display: block; }
.preview-overlay { position: absolute; inset: 0; background: rgba(0,0,0,0); transition: background 0.15s; display: flex; flex-direction: column; justify-content: flex-end; padding: 8px; }
.preview-card:hover .preview-overlay { background: rgba(0,0,0,0.45); }
.preview-name { font-size: 10px; color: #fff; font-weight: 600; opacity: 0; transition: opacity 0.15s; white-space: nowrap; overflow: hidden; text-overflow: ellipsis; }
.preview-card:hover .preview-name { opacity: 1; }
.remove-btn { position: absolute; top: 6px; right: 6px; width: 22px; height: 22px; background: rgba(15,23,42,0.7); border: none; border-radius: 50%; color: #fff; font-size: 13px; cursor: pointer; display: flex; align-items: center; justify-content: center; opacity: 0; transition: opacity 0.15s; padding: 0; line-height: 1; }
.preview-card:hover .remove-btn { opacity: 1; }
.status-chip { position: absolute; bottom: 6px; right: 6px; font-size: 9px; font-weight: 700; padding: 2px 7px; border-radius: 20px; opacity: 0; transition: opacity 0.15s; }
.status-chip.uploading { background: rgba(14,165,233,0.9); color: #fff; }
.status-chip.done { background: rgba(34,197,94,0.9); color: #fff; }
.status-chip.error { background: rgba(239,68,68,0.9); color: #fff; }
.preview-card.is-uploading .status-chip { opacity: 1; }
.preview-card.is-done .status-chip { opacity: 1; }
.footer { display: flex; justify-content: space-between; align-items: center; margin-top: 16px; padding-top: 16px; border-top: 1px solid #f1f5f9; }
.footer span { font-size: 13px; color: #64748b; }
.footer-btns { display: flex; gap: 8px; }
.btn-clear { background: none; border: 1px solid #e2e8f0; color: #64748b; padding: 8px 16px; border-radius: 8px; font-size: 13px; cursor: pointer; transition: all 0.15s; }
.btn-clear:hover { background: #f8fafc; color: #1e293b; }
.btn-upload { background: #6366f1; color: #fff; border: none; padding: 8px 20px; border-radius: 8px; font-size: 13px; font-weight: 700; cursor: pointer; transition: background 0.15s; }
.btn-upload:hover { background: #4f46e5; }
.btn-upload:disabled { background: #e2e8f0; color: #94a3b8; cursor: not-allowed; }var MAX_FILES = 12;
var MAX_MB = 5;
var files = [];
function triggerInput() {
document.getElementById('fileInput').click();
}
function onDragOver(e) {
e.preventDefault();
document.getElementById('dropzone').classList.add('active');
}
function onDragLeave() {
document.getElementById('dropzone').classList.remove('active');
}
function onDrop(e) {
e.preventDefault();
document.getElementById('dropzone').classList.remove('active');
addFiles(Array.from(e.dataTransfer.files));
}
function onFilePick(e) {
addFiles(Array.from(e.target.files));
e.target.value = '';
}
function addFiles(newFiles) {
var imageFiles = newFiles.filter(function(f) { return f.type.startsWith('image/'); });
var remaining = MAX_FILES - files.length;
imageFiles.slice(0, remaining).forEach(function(file) {
if (file.size > MAX_MB * 1024 * 1024) { alert(file.name + ' exceeds ' + MAX_MB + 'MB limit.'); return; }
files.push(file);
renderCard(file, files.length - 1);
});
updateFooter();
}
function renderCard(file, idx) {
var grid = document.getElementById('previewGrid');
var card = document.createElement('div');
card.className = 'preview-card';
card.id = 'card-' + idx;
var url = URL.createObjectURL(file);
card.innerHTML = '<img class="preview-img" src="' + url + '" alt="' + file.name + '"><div class="preview-overlay"><span class="preview-name">' + file.name + '</span></div><button class="remove-btn" onclick="removeFile(' + idx + ')" title="Remove">×</button><span class="status-chip"></span>';
grid.appendChild(card);
}
function removeFile(idx) {
files[idx] = null;
var card = document.getElementById('card-' + idx);
if (card) { card.style.opacity = '0'; card.style.transform = 'scale(0.8)'; card.style.transition = 'all 0.2s'; setTimeout(function() { card.remove(); }, 200); }
updateFooter();
}
function updateFooter() {
var count = files.filter(Boolean).length;
var footer = document.getElementById('footer');
footer.style.display = count > 0 ? 'flex' : 'none';
document.getElementById('fileCount').textContent = count + ' file' + (count !== 1 ? 's' : '') + ' selected';
}
function clearAll() {
files = [];
document.getElementById('previewGrid').innerHTML = '';
updateFooter();
}
function fakeUpload() {
var cards = document.querySelectorAll('.preview-card');
var btn = document.querySelector('.btn-upload');
btn.disabled = true;
btn.textContent = 'Uploading...';
cards.forEach(function(card, i) {
var chip = card.querySelector('.status-chip');
chip.textContent = 'Uploading';
chip.className = 'status-chip uploading';
card.classList.add('is-uploading');
setTimeout(function() {
card.classList.remove('is-uploading');
card.classList.add('is-done');
chip.textContent = 'Done';
chip.className = 'status-chip done';
}, 800 + i * 300);
});
setTimeout(function() {
btn.disabled = false;
btn.textContent = 'Upload Files';
}, 800 + cards.length * 300);
}Learn Coding Visually
Learn to code with interactive, live-preview playgrounds — HTML, CSS, JavaScript, React & more.
 HTML Playground42 lessons · Click-based · Live preview
 CSS PlaygroundLearn CSS with a live editor
 JavaScript Playground60 lessons · DOM · Async · Canvas
 React PlaygroundLearn React with a live code editor
 GSAP PlaygroundLearn GSAP animation interactively
 SVG Playground44 lessons · shapes · paths · animation
 SCSS Playground45 lessons · Sass modules · tokens
 Tailwind PlaygroundLearn Tailwind CSS with a live editor
 Bootstrap 5 Playground50 lessons · live preview
Media Upload Grid — Free HTML CSS JS Snippet
Media Upload Grid · Forms · Plain HTML, CSS & JS · Live preview
What's included
Features
About this UI Snippet
Media Upload Grid — Drag and Drop, Thumbnail Previews, and Per-File Status
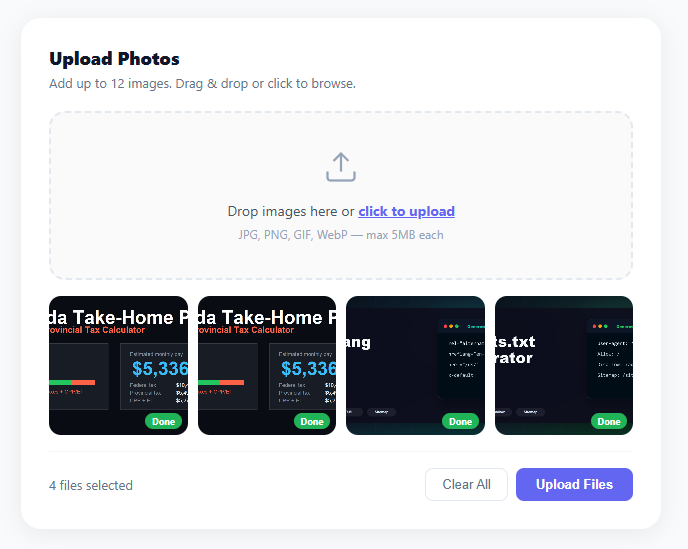
A media upload grid lets users select multiple image files at once and see thumbnail previews before upload — the standard pattern for photo galleries, product image uploads, social media posts, and profile media. This snippet provides a drag-and-drop zone, click-to-browse via a hidden file input, a responsive thumbnail grid using URL.createObjectURL, per-file remove buttons, a file count footer with upload and clear buttons, and a simulated per-file upload status (uploading/done) demonstration.
The drag-and-drop zone
onDragOver(e) calls e.preventDefault() — this is required to allow the drop event to fire (browsers block drop by default). It also adds the .active class for the visual hover state. onDragLeave removes .active. onDrop(e) calls e.preventDefault() to prevent browser default file-open behavior, removes .active, and calls addFiles() with the dropped FileList items.
URL.createObjectURL for instant previews
URL.createObjectURL(file) generates a temporary blob:// URL from a local File object. This URL can be used directly as an img src — no upload is needed for the preview. The object URL is valid for the lifetime of the page. For cleanup, call URL.revokeObjectURL(url) when the card is removed to free browser memory.
File validation
addFiles() filters for image/* MIME type and enforces MAX_MB (5MB) per file and MAX_FILES (12) total. Files that fail the size check show an alert. The remaining count limit prevents adding more than MAX_FILES thumbnails.
The remove pattern
removeFile(idx) sets files[idx] = null (preserving array indices for other cards) and animates the card out with opacity and scale transitions before removing it from the DOM. A null-check in updateFooter() uses files.filter(Boolean).length for the accurate remaining count.
The simulated upload status
fakeUpload() demonstrates the per-card status chip pattern: uploading (blue) → done (green). In production, replace the setTimeout logic with real fetch() or XMLHttpRequest calls that update each card's chip based on the upload response.
Build with AI
Build, Understand, Optimize, and Extend It With AI
You do not need to puzzle out the files[idx] = null pattern on your own. Paste this snippet's HTML, CSS, and JS into an AI coding assistant like Claude and ask it to explain exactly why removeFile() sets an array slot to null instead of splicing the file out, and how updateFooter()'s files.filter(Boolean).length works around that to still report an accurate count. The same assistant can help optimize it, for instance asking whether the blob URLs created by URL.createObjectURL are ever revoked, and what happens to browser memory if a user adds and removes dozens of images without calling URL.revokeObjectURL. It is also useful for extending the uploader: ask it to replace the simulated fakeUpload() timeouts with a real XMLHttpRequest that reports per-file progress, add drag-to-reorder for the preview grid, or validate image dimensions before accepting a file. Treat the code less like a finished artifact and more like a starting point for a conversation.
Prompt to recreate it
Copy this into your AI assistant of choice to build the effect from scratch, or as a jumping-off point for your own variant:
Build a "media upload grid" in plain HTML, CSS, and JavaScript with no libraries.

Requirements:
- A dropzone element that opens a hidden multi-file image input on click, and also accepts drag-and-drop: dragover must call preventDefault and toggle an active visual state, dragleave must remove it, and drop must call preventDefault, remove the active state, and process the dropped FileList.
- A shared file-processing function that filters incoming files to images only, enforces both a maximum total file count and a maximum size per file (rejecting oversized files with a clear message naming the offending file), and only accepts as many additional files as remain under the total cap.
- Each accepted file must be rendered immediately as a thumbnail card using a browser-generated object URL for the image source (no upload required to preview it), with a hover-revealed filename overlay and a remove button.
- Removing a file must mark that specific slot as empty in the underlying files collection without shifting or renumbering the other files' indices, animate the corresponding card out (fade and shrink) before removing it from the DOM, and update a footer count that correctly counts only the remaining non-empty slots.
- A footer must appear only once at least one file is selected, showing the live count with correct singular/plural wording, alongside a "Clear All" button that empties everything and an "Upload Files" button.
- Clicking "Upload Files" must simulate a per-card upload sequence: each card shows a distinct "uploading" status chip, then transitions to a "done" status chip after a staggered delay (not all cards finishing simultaneously), and the upload button itself must disable and relabel during the whole sequence and only re-enable once every card has finished.
Want to tighten it up first? Run this prompt through the AI Prompt Studio to score it across 8 quality dimensions, catch anti-patterns, and tune the wording for Claude, ChatGPT, or Gemini before you paste it in.
Step by step
How to Use
- 1Click the drop zone or drag images onto itClick the dashed drop zone to open the file browser. Select one or more image files (JPG, PNG, GIF, WebP). Or drag image files directly from your desktop onto the zone — the border turns indigo while dragging.
- 2Preview and remove imagesSelected images appear as square thumbnails in a responsive grid. Hover any thumbnail to reveal the filename and an × remove button. Click × to remove that image from the selection.
- 3Clear all or uploadThe footer shows the file count. Click Clear All to remove all selections. Click Upload Files to see the simulated per-card upload status (replace with a real API call in production).
- 4Change limitsEdit var MAX_FILES = 12 and var MAX_MB = 5 at the top of the JS to change the maximum file count and size limit.
- 5Wire to a real upload endpointReplace fakeUpload() with a FormData POST: for each non-null file, create a FormData, append the file, and fetch("/api/upload", { method: "POST", body: formData }). Update the card chip with the response status.
- 6Export for your frameworkClick "JSX" for a React component using useState for files array and useRef for the input. Click "Vue" for a Vue 3 SFC with reactive file list.
Real-world uses
Common Use Cases
Got questions?
Frequently Asked Questions
Three events: ondragover must call e.preventDefault() to allow dropping (browsers block drop by default). ondragleave resets visual state. ondrop calls e.preventDefault() to stop the browser from navigating to the file, then reads e.dataTransfer.files — a FileList of dropped files. Convert to Array with Array.from() to use .filter() and .forEach(). To accept drops from external sources like a browser tab showing an image, also check e.dataTransfer.items[0].kind === "file" before reading the file. For improved UX, add a dragenter listener on the entire document to show a full-page drop overlay when the user drags a file anywhere over the browser window, not just the upload zone. Remove the overlay on dragleave when e.relatedTarget is null (the drag left the window entirely) or on drop.
Create a FormData object and append each file: const fd = new FormData(); files.filter(Boolean).forEach((f, i) => fd.append("file" + i, f)); Then POST: const res = await fetch("/api/upload", { method: "POST", body: fd }). No Content-Type header needed — the browser sets the correct multipart/form-data boundary automatically.
Use XMLHttpRequest instead of fetch for progress events: const xhr = new XMLHttpRequest(); xhr.upload.onprogress = e => { const pct = Math.round(e.loaded / e.total * 100); updateCardProgress(idx, pct); }; xhr.open("POST", "/api/upload"); xhr.send(formData). Track progress per card by storing the XHR in a map keyed by file index. Show a thin progress bar overlay at the bottom of each thumbnail card — set its width to pct + "%" on each onprogress event. On xhr.onload, switch the overlay to the green "done" chip. On xhr.onerror, show a red "failed" chip with a retry button that re-runs the same XHR with the original file. This pattern handles concurrent multi-file uploads because each card has its own independent XHR object.
In React, store files in const [files, setFiles] = useState([]). Use a ref on the hidden input: const inputRef = useRef(). Handle drops with onDrop on the dropzone div (add onDragOver with e.preventDefault()). Generate previews with URL.createObjectURL(file) inside useMemo or directly on add. In Vue 3, use a ref([]) for the files array and define handleDrop, handlePick, and removeFile as functions. The template uses @drop.prevent and @dragover.prevent on the dropzone div.