Source Code
<div class="au">
  <label class="au-ring" title="Upload a photo">
    <input type="file" class="au-input" accept="image/*">
    <img class="au-img" alt="" hidden>
    <span class="au-placeholder">
      <svg viewBox="0 0 24 24"><path d="M20 21v-2a4 4 0 0 0-4-4H8a4 4 0 0 0-4 4v2"/><circle cx="12" cy="7" r="4"/></svg>
    </span>
    <span class="au-edit">
      <svg viewBox="0 0 24 24"><path d="M23 19a2 2 0 0 1-2 2H3a2 2 0 0 1-2-2V8a2 2 0 0 1 2-2h4l2-3h6l2 3h4a2 2 0 0 1 2 2z"/><circle cx="12" cy="13" r="4"/></svg>
    </span>
  </label>

  <div class="au-meta">
    <p class="au-name">Profile photo</p>
    <p class="au-hint">JPG or PNG, square works best.</p>
    <button type="button" class="au-remove" hidden>Remove photo</button>
  </div>
</div>
* { box-sizing: border-box; margin: 0; padding: 0; }
body {
font-family: system-ui, sans-serif;
background: #f8fafc;
min-height: 100vh;
display: flex; align-items: center; justify-content: center;
}
.au { display: flex; align-items: center; gap: 18px; }
.au-ring {
position: relative;
width: 96px; height: 96px;
border-radius: 50%;
background: #eef2ff;
border: 2px dashed #c7d2fe;
display: grid; place-items: center;
cursor: pointer; overflow: hidden;
transition: border-color 0.15s, background 0.15s;
}
.au-ring:hover { border-color: #6366f1; background: #e0e7ff; }
.au-ring:focus-within { box-shadow: 0 0 0 4px rgba(99,102,241,0.25); }
.au-input { position: absolute; width: 1px; height: 1px; opacity: 0; }
.au-img { position: absolute; inset: 0; width: 100%; height: 100%; object-fit: cover; }
.au-placeholder svg { width: 34px; height: 34px; fill: none; stroke: #818cf8; stroke-width: 1.8; stroke-linecap: round; stroke-linejoin: round; }
/* Camera badge bottom-right — appears solid once an image is set */
.au-edit {
position: absolute;
right: 4px; bottom: 4px;
width: 28px; height: 28px;
display: grid; place-items: center;
background: #6366f1;
border: 2px solid #f8fafc;
border-radius: 50%;
opacity: 0; transform: scale(0.6);
transition: opacity 0.18s, transform 0.18s;
}
.au-ring:hover .au-edit, .au-ring.has-img .au-edit { opacity: 1; transform: scale(1); }
.au-edit svg { width: 14px; height: 14px; fill: none; stroke: #fff; stroke-width: 2; stroke-linecap: round; stroke-linejoin: round; }
.au-ring.has-img { border-style: solid; border-color: #e2e8f0; background: #fff; }
.au-ring.has-img .au-placeholder { display: none; }
.au-name { font-size: 15px; font-weight: 700; color: #1e293b; }
.au-hint { font-size: 12.5px; color: #94a3b8; margin: 3px 0 9px; }
.au-remove {
font-size: 12.5px; font-weight: 600; color: #dc2626;
background: none; border: none; cursor: pointer; padding: 0;
}
.au-remove:hover { text-decoration: underline; }function initAvatarUpload() {
const ring = document.querySelector('.au-ring');
if (!ring) return; // not mounted yet
const input = ring.querySelector('.au-input');
const img = ring.querySelector('.au-img');
const removeBtn = document.querySelector('.au-remove');
let currentUrl = null;
input.addEventListener('change', () => {
const file = input.files[0];
if (!file || !file.type.startsWith('image/')) return;
if (currentUrl) URL.revokeObjectURL(currentUrl);
currentUrl = URL.createObjectURL(file); // instant local preview, no upload
img.src = currentUrl;
img.hidden = false;
ring.classList.add('has-img');
removeBtn.hidden = false;
});
removeBtn.addEventListener('click', () => {
if (currentUrl) { URL.revokeObjectURL(currentUrl); currentUrl = null; }
input.value = '';
img.hidden = true; img.removeAttribute('src');
ring.classList.remove('has-img');
removeBtn.hidden = true;
});
}
// Run after the DOM mounts (framework exports run snippet JS before render)
if (document.readyState === 'loading') document.addEventListener('DOMContentLoaded', initAvatarUpload);
else requestAnimationFrame(initAvatarUpload);Learn Coding Visually
Learn to code with interactive, live-preview playgrounds — HTML, CSS, JavaScript, React & more.
 HTML Playground42 lessons · Click-based · Live preview
 CSS PlaygroundLearn CSS with a live editor
 JavaScript Playground60 lessons · DOM · Async · Canvas
 React PlaygroundLearn React with a live code editor
 GSAP PlaygroundLearn GSAP animation interactively
 SVG Playground44 lessons · shapes · paths · animation
 SCSS Playground45 lessons · Sass modules · tokens
 Tailwind PlaygroundLearn Tailwind CSS with a live editor
 Bootstrap 5 Playground50 lessons · live preview
Avatar Upload — Profile Picture Preview Snippet
Avatar Upload · Forms · Plain HTML, CSS & JS · Live preview
What's included
Features
About this UI Snippet
Avatar Upload — Circular Dropzone, Instant Preview & Camera Edit Badge
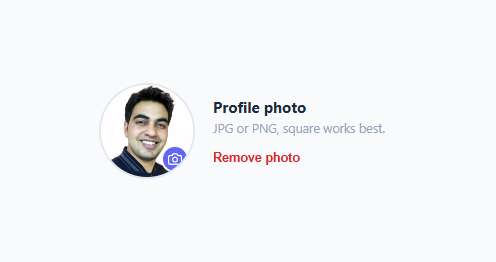
An avatar upload — a circular control for choosing a profile picture with an instant preview — is one of the most-searched form snippets because nearly every app with user accounts (and every profile card) needs one, and doing it well (preview, remove, no broken images, no memory leaks) takes more than a bare file input. This snippet is a complete, accessible avatar uploader: a circular dropzone with a placeholder icon, an instant local preview of the chosen image, a camera edit badge, and a remove button — all built on a real <input type="file"> so it submits and is keyboard-operable.
Instant preview with createObjectURL
The moment a user picks an image, it appears in the circle — no upload, no server round-trip. The change handler calls URL.createObjectURL(file), which creates a temporary local URL pointing at the chosen file in memory, and sets it as the <img> source. This is the standard, efficient way to preview a selected file: it is instant and does not read the whole file into a base64 string the way FileReader does. The image is shown with object-fit: cover so any aspect ratio fills the circle without distortion — a portrait or landscape photo is cropped to a clean square avatar automatically (for manual framing, add the image cropper).
Avoiding the memory leak (revokeObjectURL)
Object URLs hold the file in memory until you release them, so a naive implementation that calls createObjectURL on every change slowly leaks memory. This snippet tracks the current URL in a currentUrl variable and calls URL.revokeObjectURL(currentUrl) before creating a new one (when the user picks a different photo) and when removing the photo. This cleanup is the detail most avatar-upload tutorials miss, and it is what makes the component safe to use repeatedly. It is the object-URL equivalent of clearing up after yourself.
The placeholder, preview, and edit states
The control has three visual states driven by a .has-img class. Empty: a dashed indigo ring with a person-silhouette placeholder icon, signaling "click to add a photo." Hover: the ring darkens and a camera badge pops in at the bottom-right. Filled: once an image is set, the ring becomes a solid border, the placeholder hides behind the photo, and the camera badge stays visible so users know they can change it. The camera badge animates in with a scale-and-fade, and its border matches the page background so it looks cleanly attached to the avatar edge. These states make the affordance obvious at every step.
The remove control
Letting users undo a choice is essential. A "Remove photo" button (hidden until a photo is set) clears everything: it revokes the object URL, resets the file input (input.value = ''), hides and unsets the <img>, drops the .has-img class back to the empty placeholder state, and hides itself. Resetting input.value is the correct way to clear a file input (you cannot set its value for security reasons, but you can clear it), which also means picking the *same* file again afterward still fires a change event.
Built on a real, accessible file input
The whole control is a <label> wrapping a hidden-but-present <input type="file" accept="image/*">. The input is hidden with opacity: 0 and 1px size (not display: none, which would remove it from the tab order), so it stays focusable and keyboard-operable, and .au-ring:focus-within shows a focus ring when it is focused. Because it is a genuine file input, the avatar is included in a normal form submit under its name, the OS file picker works, and screen readers announce it as a file upload. The accept="image/*" attribute filters the picker to images, and the handler double-checks file.type.startsWith('image/') before previewing.
Customizing the uploader
Re-theme by changing the empty ring's dashed color, the hover state, the camera badge color, and the focus ring. Resize by changing the ring's width/height (keep it a circle) and scaling the badge. To enforce a max file size, check file.size in the handler and show an error if it is too large. To crop to a square before upload, pair this with a cropping step, or rely on object-fit: cover plus a server-side crop. To actually upload, send the file (from input.files[0]) via fetch with FormData when the form submits — the preview and the upload are independent, so the UI stays responsive. The structure — label, hidden input, img, placeholder, badge, remove — stays the same.
Accessibility and behaviour notes
Keep the native input so the control is keyboard-focusable and submits with the form; :focus-within makes keyboard focus visible. Give the <label> a title or visually-hidden text like "Upload a profile photo" so its purpose is announced (the placeholder icon alone is not descriptive). When a photo is loaded, set a meaningful alt on the <img> (e.g. "Your profile photo") rather than leaving it empty, so screen-reader users know an image is present. Because the preview is purely local until submit, nothing is uploaded or stored without the user completing the form — a privacy-friendly default.
Build with AI
Build, Understand, Optimize, and Extend It With AI
Rather than assuming the file input is just decoration, paste this snippet's HTML, CSS, and JS into an AI coding assistant like Claude and ask it to explain exactly why the input is hidden with opacity and a 1px size instead of display: none, and why revokeObjectURL is called both before creating a new preview and on removal. The same assistant can help you optimize it — ask whether checking file.type.startsWith("image/") is sufficient validation for production, or whether a file.size check and a maximum-dimension check should happen before createObjectURL is ever called. It's also a great partner for extending the uploader: ask it to add drag-and-drop support onto the same dropzone, wire in a square-crop step before the preview is finalized, or add an upload progress ring around the avatar once the real fetch/FormData submission is wired up. Treat the code less like a finished artifact and more like a starting point for a conversation.
Prompt to recreate it
Copy this into your AI assistant of choice to build the effect from scratch, or as a jumping-off point for your own variant:
Build a circular "avatar upload" control in plain HTML, CSS, and JavaScript using a real file input — no third-party cropper or upload library.

Requirements:
- A label element wrapping a genuinely present (not display:none) file input restricted to accept="image/*", hidden visually via near-zero opacity and a 1px size so it stays in the tab order and keyboard-focusable, with a visible focus ring on the wrapping circle when the input has focus (using :focus-within).
- On file selection, validate that the chosen file's type starts with "image/", then generate an instant local preview using URL.createObjectURL (not FileReader/base64), setting it as the source of an img element that uses object-fit: cover to crop any aspect ratio into a clean circle.
- Track the currently active object URL in a variable and call URL.revokeObjectURL on it both immediately before creating a new preview URL and when the photo is removed, so repeated selections never leak memory.
- The control must visually shift between three states driven by a single CSS class: an empty state with a dashed border and placeholder icon, a hover state that reveals a small camera "edit" badge in the corner, and a filled state where the border becomes solid, the placeholder hides, and the camera badge stays visible to indicate the photo can be changed.
- A "remove photo" button, hidden until a photo is set, must revoke the object URL, reset the file input's value (not attempt to set it), clear and hide the img element, and revert the control back to its empty state.
- Ensure picking the exact same file a second time in a row still triggers a fresh change event and a fresh preview, which requires the input's value to actually be cleared on removal.
Want to tighten it up first? Run this prompt through the AI Prompt Studio to score it across 8 quality dimensions, catch anti-patterns, and tune the wording for Claude, ChatGPT, or Gemini before you paste it in.
Step by step
How to Use
- 1Copy the controlCopy the .au-ring label with its hidden <input type="file">, the <img> preview, placeholder, camera badge, and the .au-remove button, plus the script.
- 2Keep the object-URL cleanupThe handler revokes the previous URL.createObjectURL before making a new one (and on remove). Keep this — it prevents a memory leak from repeated previews.
- 3Wire up the actual uploadOn form submit, send input.files[0] via fetch with FormData. The local preview is independent, so the UI stays instant.
- 4Validate the fileThe handler checks file.type starts with image/. Add a file.size check to enforce a maximum and show an error if too large.
- 5Re-theme and resizeChange the dashed ring color, hover, camera badge, and focus ring; resize by changing the ring width/height (keep it circular).
- 6Export in your formatClick "HTML" for a standalone file, "JSX" for a React component, or "Tailwind" for a React + Tailwind version.
Real-world uses
Common Use Cases
Got questions?
Frequently Asked Questions
In the file input's change handler, call URL.createObjectURL(file) to get a temporary local URL and set it as an <img> src. The preview is instant and does not upload anything or read the file into a base64 string like FileReader does. Use object-fit: cover so any photo fills the avatar circle cleanly.
Object URLs keep the file in memory until released. If you call createObjectURL on every change without revoking the old one, you leak memory. This snippet tracks the current URL and revokes it before creating a new one and when the photo is removed — the cleanup most tutorials skip.
Revoke the object URL, set input.value = "" to reset the file input, hide and unset the <img>, and remove the filled-state class. Resetting input.value is the correct way to clear a file input and also lets the same file be re-selected afterward.
On form submit, take input.files[0], put it in a FormData, and POST it with fetch. The local preview is independent of the upload, so the UI stays instant; the file is only sent when the user completes the form.
Yes. It keeps a real <input type="file"> (hidden via opacity, not display:none) so it is keyboard-focusable and submits with the form, with a focus-within ring. Add a title or visually-hidden label to the control and a meaningful alt on the loaded image so screen-reader users understand its purpose.
Yes. Click "JSX" for a React component or "Tailwind" for a React + Tailwind version. In React, hold the preview URL in useState, create it in onChange and revoke it in a useEffect cleanup, and render the <img> or placeholder based on whether a URL exists.