Source Code
<section class="bah-hero">
  <div class="bah-copy">
    <span class="bah-eyebrow">Real results, real fast</span>
    <h1 class="bah-h1">See the transformation<br>for yourself</h1>
    <p class="bah-sub">Drag the handle to compare before and after. This is the same photo, the same lighting — only our one-click enhance is different.</p>
    <a href="#" class="bah-cta">Try it free</a>
  </div>

  <div class="bah-compare" id="bahCompare">
    <div class="bah-after">
      <span class="bah-tag bah-tag-after">After</span>
    </div>
    <div class="bah-before" id="bahBefore">
      <span class="bah-tag bah-tag-before">Before</span>
    </div>
    <div class="bah-handle" id="bahHandle">
      <span class="bah-handle-grip">
        <svg width="14" height="14" viewBox="0 0 24 24" fill="none" stroke="currentColor" stroke-width="2.5" stroke-linecap="round"><polyline points="15 18 9 12 15 6"/></svg>
        <svg width="14" height="14" viewBox="0 0 24 24" fill="none" stroke="currentColor" stroke-width="2.5" stroke-linecap="round"><polyline points="9 18 15 12 9 6"/></svg>
      </span>
    </div>
  </div>
</section>*{box-sizing:border-box;margin:0;padding:0}
body{font-family:system-ui,-apple-system,sans-serif;background:#0b0e17;color:#f1f5f9}
.bah-hero{min-height:100vh;display:flex;flex-direction:column;align-items:center;justify-content:center;gap:44px;padding:80px 24px}
.bah-copy{text-align:center;display:flex;flex-direction:column;align-items:center;gap:16px;max-width:600px}
.bah-eyebrow{font-size:12px;font-weight:700;letter-spacing:.08em;text-transform:uppercase;color:#fb923c}
.bah-h1{font-size:clamp(30px,5.2vw,54px);font-weight:800;line-height:1.12;letter-spacing:-.02em}
.bah-sub{font-size:15.5px;color:#94a3b8;line-height:1.7;max-width:480px}
.bah-cta{margin-top:4px;background:#fb923c;color:#1c0f02;font-weight:700;font-size:15px;padding:12px 28px;border-radius:9px;text-decoration:none;box-shadow:0 6px 22px rgba(251,146,60,.3);transition:transform .15s}
.bah-cta:hover{transform:translateY(-2px)}
.bah-compare{position:relative;width:min(720px,92vw);aspect-ratio:16/9;border-radius:18px;overflow:hidden;user-select:none;box-shadow:0 20px 60px rgba(0,0,0,.5);border:1px solid rgba(255,255,255,.08);cursor:ew-resize}
.bah-after,.bah-before{position:absolute;inset:0;display:flex;align-items:flex-end;justify-content:flex-start;padding:16px}
.bah-after{background:linear-gradient(135deg,#fde68a,#fb923c 45%,#f472b6 100%)}
.bah-before{background:linear-gradient(135deg,#334155,#1e293b 55%,#0f172a 100%);filter:grayscale(.3) brightness(.85);overflow:hidden;width:50%}
.bah-tag{font-size:12px;font-weight:800;letter-spacing:.04em;text-transform:uppercase;padding:6px 12px;border-radius:6px;backdrop-filter:blur(6px)}
.bah-tag-after{background:rgba(0,0,0,.35);color:#fff}
.bah-tag-before{background:rgba(0,0,0,.4);color:#e2e8f0}
.bah-before .bah-tag{position:absolute;bottom:16px;left:16px}
.bah-handle{position:absolute;top:0;bottom:0;left:50%;width:0;transform:translateX(-50%);pointer-events:none}
.bah-handle::before{content:'';position:absolute;top:0;bottom:0;left:-1px;width:2px;background:#fff;box-shadow:0 0 0 1px rgba(0,0,0,.2)}
.bah-handle-grip{position:absolute;top:50%;left:50%;transform:translate(-50%,-50%);width:42px;height:42px;border-radius:50%;background:#fff;display:flex;align-items:center;justify-content:center;gap:1px;color:#1e293b;pointer-events:auto;cursor:ew-resize;box-shadow:0 4px 14px rgba(0,0,0,.35)}// Real drag-tracked before/after slider — position is computed from pointer coordinates, not animated blindly.
const compare = document.getElementById('bahCompare');
const before = document.getElementById('bahBefore');
const handle = document.getElementById('bahHandle');
let dragging = false;
function setPosition(clientX) {
const rect = compare.getBoundingClientRect();
let pct = ((clientX - rect.left) / rect.width) * 100;
pct = Math.max(0, Math.min(100, pct));
before.style.width = pct + '%';
handle.style.left = pct + '%';
}
function onPointerDown(e) {
dragging = true;
compare.setPointerCapture(e.pointerId);
setPosition(e.clientX);
}
function onPointerMove(e) {
if (!dragging) return;
setPosition(e.clientX);
}
function onPointerUp(e) {
dragging = false;
try { compare.releasePointerCapture(e.pointerId); } catch (err) {}
}
compare.addEventListener('pointerdown', onPointerDown);
compare.addEventListener('pointermove', onPointerMove);
compare.addEventListener('pointerup', onPointerUp);
compare.addEventListener('pointercancel', onPointerUp);
// Keyboard support: focus the handle and use arrow keys.
handle.setAttribute('tabindex', '0');
handle.setAttribute('role', 'slider');
handle.setAttribute('aria-label', 'Before/after comparison position');
handle.setAttribute('aria-valuemin', '0');
handle.setAttribute('aria-valuemax', '100');
function currentPct() {
return parseFloat(before.style.width) || 50;
}
handle.addEventListener('keydown', (e) => {
let pct = currentPct();
if (e.key === 'ArrowLeft') pct = Math.max(0, pct - 5);
else if (e.key === 'ArrowRight') pct = Math.min(100, pct + 5);
else return;
e.preventDefault();
before.style.width = pct + '%';
handle.style.left = pct + '%';
handle.setAttribute('aria-valuenow', String(Math.round(pct)));
});
// Initialize at 50%.
setPosition(compare.getBoundingClientRect().left + compare.getBoundingClientRect().width / 2);Learn Coding Visually
Learn to code with interactive, live-preview playgrounds — HTML, CSS, JavaScript, React & more.
 HTML Playground42 lessons · Click-based · Live preview
 CSS PlaygroundLearn CSS with a live editor
 JavaScript Playground60 lessons · DOM · Async · Canvas
 React PlaygroundLearn React with a live code editor
 GSAP PlaygroundLearn GSAP animation interactively
 SVG Playground44 lessons · shapes · paths · animation
 SCSS Playground45 lessons · Sass modules · tokens
 Tailwind PlaygroundLearn Tailwind CSS with a live editor
 Bootstrap 5 Playground50 lessons · live preview
Before/After Hero with Comparison Slider — Free HTML CSS JS Snippet
Before/After Hero with Comparison Slider · Heroes · Plain HTML, CSS & JS · Live preview
What's included
Features
About this UI Snippet
Before/After Hero with Draggable Comparison Slider
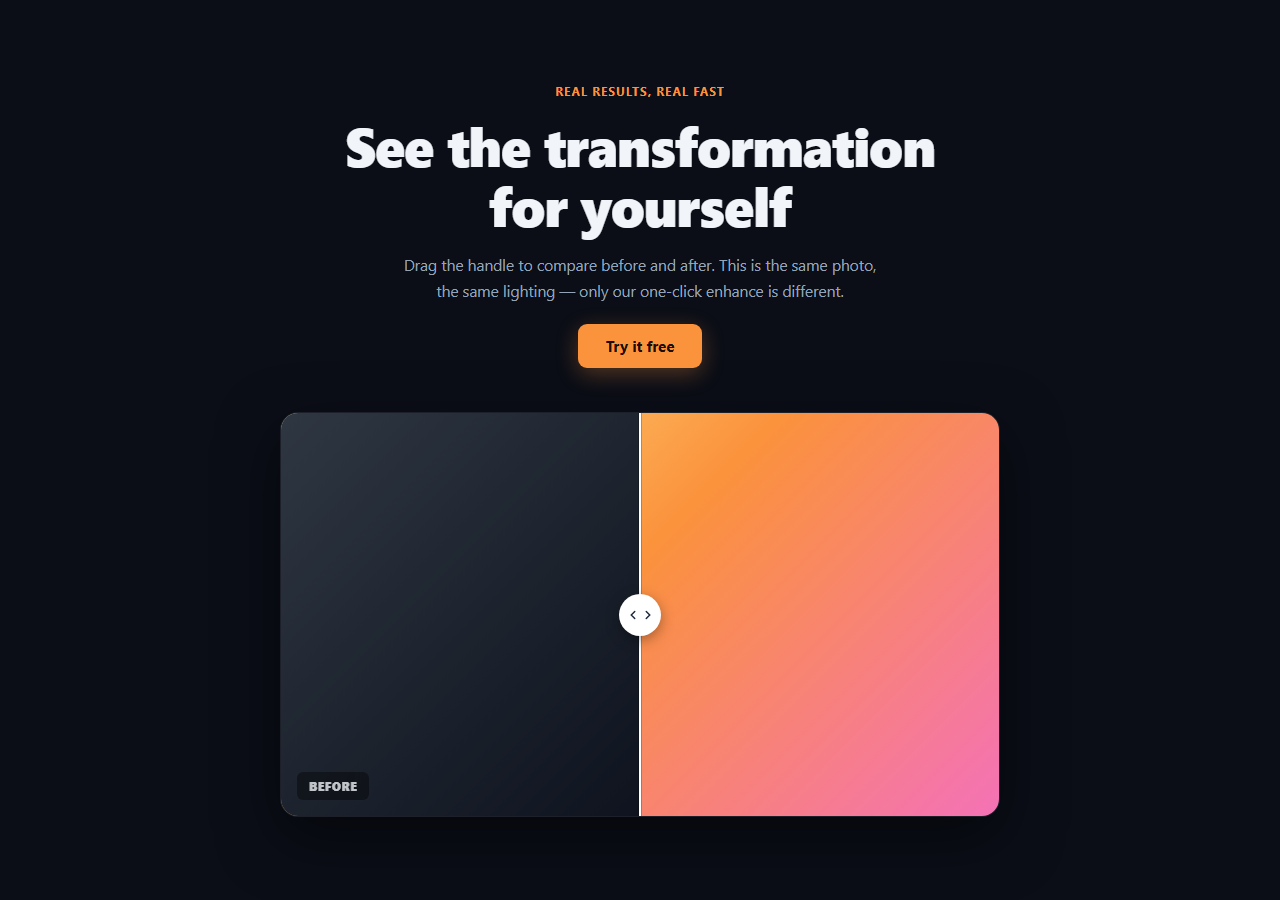
Photo editing tools, fitness apps, home-improvement services, and design agencies all share the same problem: how do you prove a transformation in a hero section without a video? This snippet answers it with a real draggable before/after slider as the primary visual — not a CSS animation that plays on a timer, but a handle whose position is computed live from the pointer's actual coordinates.
Pointer-tracked drag, not a scripted animation
The core interaction is in setPosition(): on every pointermove while dragging, it reads the comparison container's getBoundingClientRect(), subtracts the pointer's clientX from the container's left edge, and divides by the container's width to get a real 0–100% position — clamped so it never leaves the container. That percentage directly sets the "before" layer's width and the handle's left, so the reveal line follows the cursor exactly, frame by frame, rather than interpolating toward a fixed target.
Pointer Events, not separate mouse/touch handlers
The slider uses pointerdown/pointermove/pointerup with setPointerCapture(), which routes all subsequent pointer events to the container even if the cursor moves faster than the handle and briefly leaves its bounds — the standard technique for a drag handle that must not "lose" the pointer mid-drag, and it works identically for mouse, touch, and stylus input without extra code paths.
Keyboard-accessible by design
The handle carries role="slider", tabindex="0", and aria-value* attributes, with a keydown listener that moves the position 5% per arrow-key press. A comparison slider that only works by mouse drag locks out keyboard and switch-device users entirely — this one is a real slider control, not just a mouse toy.
Two CSS-gradient "photos"
Rather than requiring real before/after image assets to demo the pattern, both layers are CSS gradients — a desaturated, dimmed "before" gradient and a vivid "after" gradient — explicitly built so you can drop in real <img> elements (object-fit: cover) in place of the gradients without touching the drag logic at all, since the JS only ever manipulates the before layer's width.
Framing it as a hero, not a widget
The comparison sits below a headline, subheading, and CTA that frame *why* the transformation matters, rather than just embedding a bare slider — the copy tells the visitor what they're about to prove to themselves by dragging.
Customizing it
Replace the gradient layers with real <img> elements, adjust the aspect-ratio to match your image dimensions, or swap the horizontal drag for a vertical one by tracking clientY/height instead. Pair it with image comparison slider for a non-hero variant, or product hero if you need a more conventional layout alongside it.
Build with AI
Build, Understand, Optimize, and Extend It With AI
Instead of guessing at the drag math, paste this snippet's HTML, CSS, and JS into an AI coding assistant like Claude and ask it to explain exactly how setPosition() converts a raw pointer clientX into a clamped 0-100% width using getBoundingClientRect(), and why setPointerCapture() matters for a drag handle that can move faster than the pointer's hit area. The same assistant can help you harden it further — ask whether the keyboard arrow-key step size should be configurable, or whether a double-tap on mobile should snap the handle to 50%. It's also useful for extending the pattern: ask it to convert the horizontal drag to a vertical one, add a subtle auto-play mode that sweeps the handle back and forth when the hero first loads (pausing on the first real user interaction), or wire real <img> elements in with a loading skeleton. Treat the code less like a finished artifact and more like a starting point for a conversation.
Prompt to recreate it
Copy this into your AI assistant of choice to build the effect from scratch, or as a jumping-off point for your own variant:
Build a hero section in plain HTML, CSS, and vanilla JavaScript centered on a real draggable before/after image comparison slider (no library, no CDN).

Requirements:
- A hero with headline, subheading, and CTA button above a comparison container roughly 16:9, containing two full-size layers (an "after" layer as the base and a "before" layer clipped on top by width) plus a vertical handle line with a circular grip in the middle showing a left/right arrow icon.
- The comparison position must be computed live from actual pointer coordinates: on pointerdown/pointermove within the container, read the container's real bounding rect via getBoundingClientRect(), compute the pointer's horizontal position as a percentage of the container's width, clamp it between 0 and 100, and set that percentage as both the before layer's width and the handle's left position — do not animate toward a fixed target or use a CSS-only animation that ignores pointer input.
- Use Pointer Events (pointerdown/pointermove/pointerup/pointercancel) with setPointerCapture so the same code path handles mouse, touch, and stylus, and so a fast drag doesn't lose tracking of the pointer.
- Make the handle keyboard accessible: give it tabindex, role="slider" with appropriate aria-value attributes, and a keydown listener that moves the position by a fixed percentage on ArrowLeft/ArrowRight.
- Use plain CSS gradients (not real image files) for the two comparison layers so the demo is self-contained, but structure the markup so real <img> elements could be dropped in without touching the JavaScript logic.
- Initialize the handle at the 50% position when the page loads.
Want to tighten it up first? Run this prompt through the AI Prompt Studio to score it across 8 quality dimensions, catch anti-patterns, and tune the wording for Claude, ChatGPT, or Gemini before you paste it in.
Step by step
How to Use
- 1Paste HTML, CSS, and JSThe hero renders with the handle centered at 50%.
- 2Drag the handlePress and drag horizontally — the before/after boundary follows your cursor exactly.
- 3Try the keyboardTab to the handle and press the left/right arrow keys to move it 5% at a time.
- 4Swap in real imagesReplace the .bah-before and .bah-after gradient backgrounds with <img> elements.
- 5Adjust the aspect ratioChange aspect-ratio on .bah-compare to match your image dimensions.
- 6Edit copy and CTAUpdate the eyebrow, headline, subheading, and button link.
Real-world uses
Common Use Cases
Got questions?
Frequently Asked Questions
On pointermove, setPosition() calls compare.getBoundingClientRect() to get the container's live position and width, subtracts the container's left edge from the pointer's clientX, and divides by the container's width to get a percentage — clamped between 0 and 100. That percentage sets both the before layer's width and the handle's left, so the boundary tracks the actual cursor position every frame rather than animating toward it.
Yes. The slider uses Pointer Events (pointerdown, pointermove, pointerup) rather than separate mouse and touch listeners, and setPointerCapture() ensures the drag keeps tracking the same pointer even if it moves quickly — this single code path covers mouse, touch, and stylus input identically.
Yes. The handle has tabindex="0", role="slider", and aria-value* attributes, and a keydown listener moves the position 5% per ArrowLeft/ArrowRight press with aria-valuenow kept in sync — so it's usable without a mouse, not just a drag-only toy.
Add <img> elements (with object-fit: cover; width/height: 100%) inside .bah-after and .bah-before in place of the gradient backgrounds, keeping the same wrapper divs and IDs. The JavaScript only ever changes before's width and handle's left — it has no dependency on what's rendered inside those layers.
Yes — track clientY and rect.top/rect.height instead of clientX and rect.left/rect.width in setPosition(), set height instead of width on the before layer, and adjust the CSS handle line to be horizontal (top/bottom auto, left/right: 0) instead of vertical.