Source Code
<canvas id="magCanvas"></canvas>
<div class="mp-caption">Move your cursor to repel the field</div>*{box-sizing:border-box;margin:0;padding:0}
html,body{width:100%;height:100%;overflow:hidden;background:#040611}
#magCanvas{display:block;width:100%;height:100%;cursor:none}
.mp-caption{position:fixed;left:50%;bottom:22px;transform:translateX(-50%);color:#c7d2fe;font:12.5px system-ui,sans-serif;letter-spacing:.03em;opacity:.65;pointer-events:none;text-transform:uppercase}const canvas = document.getElementById('magCanvas');
const renderer = new THREE.WebGLRenderer({ canvas, antialias: true, alpha: true });
renderer.setPixelRatio(Math.min(window.devicePixelRatio, 2));
const scene = new THREE.Scene();
const camera = new THREE.PerspectiveCamera(50, 1, 0.1, 50);
camera.position.z = 12;
// An invisible plane at z=0 gives the raycaster something flat to
// intersect, converting the 2D cursor into a 3D point that always sits
// on the same plane as the particle grid.
const pickPlane = new THREE.Mesh(
new THREE.PlaneGeometry(60, 60),
new THREE.MeshBasicMaterial({ visible: false })
);
scene.add(pickPlane);
const GRID = 46;
const SPACING = 0.34;
const COUNT = GRID * GRID;
const positions = new Float32Array(COUNT * 3);
const home = new Float32Array(COUNT * 3); // each particle's resting position
const velocity = new Float32Array(COUNT * 3);
const colors = new Float32Array(COUNT * 3);
let idx = 0;
for (let x = 0; x < GRID; x++) {
for (let y = 0; y < GRID; y++) {
const px = (x - GRID / 2) * SPACING;
const py = (y - GRID / 2) * SPACING;
positions[idx * 3] = px; positions[idx * 3 + 1] = py; positions[idx * 3 + 2] = 0;
home[idx * 3] = px; home[idx * 3 + 1] = py; home[idx * 3 + 2] = 0;
colors[idx * 3] = 0.4; colors[idx * 3 + 1] = 0.6; colors[idx * 3 + 2] = 1;
idx++;
}
}
const geometry = new THREE.BufferGeometry();
geometry.setAttribute('position', new THREE.BufferAttribute(positions, 3));
geometry.setAttribute('color', new THREE.BufferAttribute(colors, 3));
const material = new THREE.PointsMaterial({ size: 0.06, vertexColors: true, transparent: true, opacity: 0.9, depthWrite: false });
const points = new THREE.Points(geometry, material);
scene.add(points);
const posAttr = geometry.getAttribute('position');
const colorAttr = geometry.getAttribute('color');
const raycaster = new THREE.Raycaster();
const pointerNDC = new THREE.Vector2(999, 999);
let cursor3D = null;
canvas.addEventListener('pointermove', e => {
const rect = canvas.getBoundingClientRect();
pointerNDC.x = ((e.clientX - rect.left) / rect.width) * 2 - 1;
pointerNDC.y = -((e.clientY - rect.top) / rect.height) * 2 + 1;
});
canvas.addEventListener('pointerleave', () => { cursor3D = null; });
const REPEL_RADIUS = 2.2;
const REPEL_STRENGTH = 0.045;
const SPRING = 0.02; // pull back toward home
const DAMPING = 0.9; // velocity decay each frame
function resize() {
const w = canvas.clientWidth, h = canvas.clientHeight;
renderer.setSize(w, h, false);
camera.aspect = w / h;
camera.updateProjectionMatrix();
}
function animate() {
requestAnimationFrame(animate);
raycaster.setFromCamera(pointerNDC, camera);
const hit = raycaster.intersectObject(pickPlane)[0];
cursor3D = hit ? hit.point : null;
for (let i = 0; i < COUNT; i++) {
const x = posAttr.getX(i), y = posAttr.getY(i), z = posAttr.getZ(i);
let vx = velocity[i * 3], vy = velocity[i * 3 + 1], vz = velocity[i * 3 + 2];
// Spring pulls every particle back toward its own resting grid slot —
// this is what makes the field "heal" once the cursor moves away.
vx += (home[i * 3] - x) * SPRING;
vy += (home[i * 3 + 1] - y) * SPRING;
vz += (home[i * 3 + 2] - z) * SPRING;
// Cursor repulsion: particles within REPEL_RADIUS of the 3D cursor
// point get pushed directly away from it, scaled by how close they are.
if (cursor3D) {
const dx = x - cursor3D.x, dy = y - cursor3D.y, dz = z - cursor3D.z;
const dist = Math.sqrt(dx * dx + dy * dy + dz * dz) || 0.001;
if (dist < REPEL_RADIUS) {
const force = (1 - dist / REPEL_RADIUS) * REPEL_STRENGTH;
vx += (dx / dist) * force;
vy += (dy / dist) * force;
vz += (dz / dist) * force;
}
}
vx *= DAMPING; vy *= DAMPING; vz *= DAMPING;
velocity[i * 3] = vx; velocity[i * 3 + 1] = vy; velocity[i * 3 + 2] = vz;
posAttr.setXYZ(i, x + vx, y + vy, z + vz);
// Color reacts to how far a particle currently sits from its home
// slot, so displaced particles visibly glow brighter than settled ones.
const displacement = Math.min(1, Math.sqrt(vx * vx + vy * vy + vz * vz) * 12);
colorAttr.setXYZ(i, 0.35 + displacement * 0.5, 0.55 + displacement * 0.35, 1);
}
posAttr.needsUpdate = true;
colorAttr.needsUpdate = true;
renderer.render(scene, camera);
}
resize();
window.addEventListener('resize', resize);
animate();Learn Coding Visually
Learn to code with interactive, live-preview playgrounds — HTML, CSS, JavaScript, React & more.
 HTML Playground42 lessons · Click-based · Live preview
 CSS PlaygroundLearn CSS with a live editor
 JavaScript Playground60 lessons · DOM · Async · Canvas
 React PlaygroundLearn React with a live code editor
 GSAP PlaygroundLearn GSAP animation interactively
 SVG Playground44 lessons · shapes · paths · animation
 SCSS Playground45 lessons · Sass modules · tokens
 Tailwind PlaygroundLearn Tailwind CSS with a live editor
 Bootstrap 5 Playground50 lessons · live preview
Three.js Magnetic Particles — Cursor-Repelled WebGL Particle Field
Three.js Magnetic Particles · Animations · Plain HTML, CSS & JS · Live preview
What's included
Features
About this UI Snippet
How to Build a Cursor-Repelled Magnetic Particle Field in Three.js
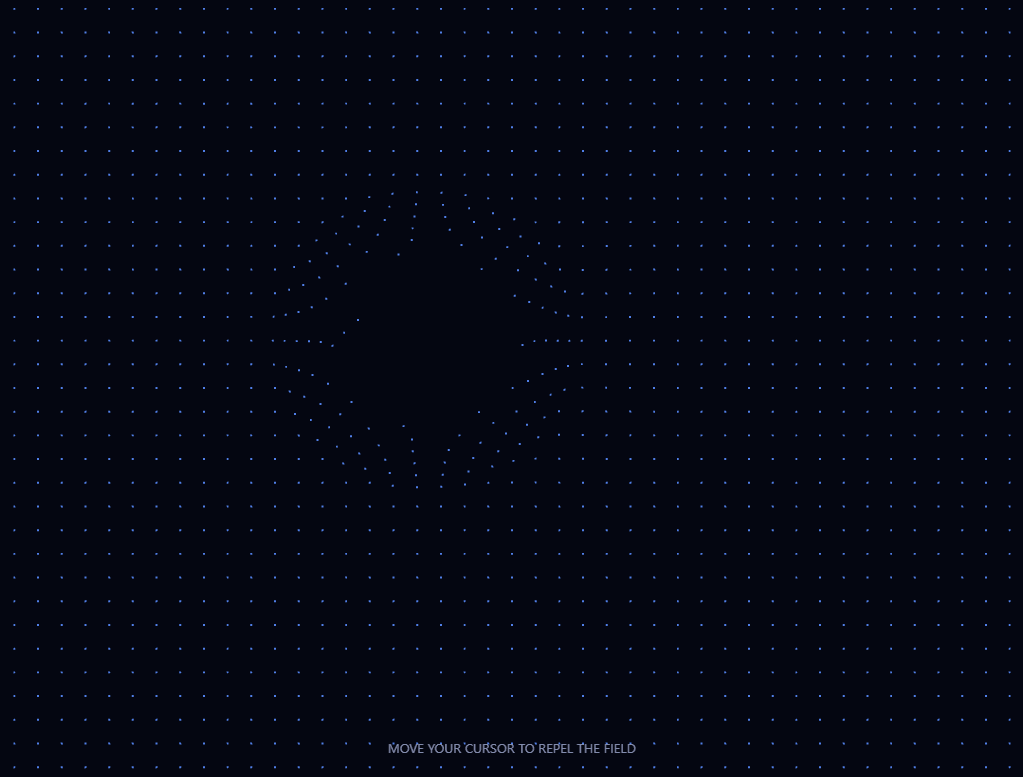
The Three.js Magnetic Particles snippet fills the screen with a grid of thousands of points that visibly repel away from the cursor as it approaches, then spring smoothly back to their original resting positions once it moves away — like iron filings reacting to a moving magnet — using THREE.Raycaster against an invisible plane, all with core Three.js loaded from a CDN.
An invisible plane turns a 2D cursor into a 3D field position
The particle grid lives entirely at z = 0, but the cursor is just two screen coordinates. To get a real 3D point that matches the particle grid's own plane, the snippet raycasts against a completely invisible THREE.Mesh — a flat plane, sized generously, given a MeshBasicMaterial with visible: false. It never renders, but it's still a real object the raycaster can intersect, so raycaster.intersectObject(pickPlane) reliably returns exactly where the cursor "touches" the Z=0 plane the particles occupy.
Two forces per particle, every frame: spring home, repel from cursor
Each particle carries its own stored home position (its resting grid slot) and its own velocity. Every frame, two forces are added into that velocity: a spring force pulling gently back toward home — proportional to how far the particle currently is from it — and, if the cursor is nearby, a repulsion force pushing directly away from the cursor's 3D position, scaled by proximity. These two forces run simultaneously and independently for every particle; the *visible* behavior — a "dent" pushed away from the cursor that heals back to a flat grid — falls entirely out of that combination, with no special-case logic for "restore the grid" anywhere in the code.
Repulsion strength falls off with distance, not a fixed push
A particle's repulsion force is scaled by (1 - distance/REPEL_RADIUS), so particles right next to the cursor get pushed hard while particles near the edge of the affected radius barely feel it — producing a smooth, rounded dent in the field rather than a sharp-edged crater with a uniform push inside a hard boundary.
Damping keeps the system stable, not just decorative
Every particle's velocity is multiplied by a DAMPING factor just under 1, every single frame, regardless of whether any force is currently acting on it. Without this, the spring force alone would cause every particle to oscillate back and forth around its home position forever, like a frictionless pendulum; damping is what lets particles actually *settle* back into place rather than perpetually overshooting.
Color intensity is driven by velocity, not position
Rather than tying color to a particle's distance from home (which is what most similar effects do), this snippet ties each particle's brightness to how fast it's currently *moving* — its velocity magnitude. This means particles caught in the middle of being pushed away glow visibly brighter than particles that have already reached a far, but now-stationary, displaced position, giving the "active disturbance" a clearer visual read than a static-position-based color would.
Where this spring-plus-repulsion pattern is used
This exact spring-toward-home-plus-repel-from-cursor combination is the foundation of interactive particle logos, magnetic hover effects, and "iron filings" style physics toys across the web. Compare its flat, mouse-driven field against the raycasted surface deformation in interactive mesh distortion, or pair it with a custom cursor snippet for a fully cursor-reactive page.
Build with AI
Build, Understand, Optimize, and Extend It With AI
You do not have to trace the spring-and-repel interaction by hand to understand it. Paste this snippet's HTML, CSS, and JS into an AI coding assistant like Claude and ask it to explain exactly why an invisible plane is needed to convert the cursor into a 3D position, or how the spring force and repulsion force combine into a self-healing field with no explicit "restore" logic anywhere. The same assistant can help optimize it, for instance checking whether the per-particle loop could skip the full distance calculation for particles clearly outside the repulsion radius using a cheaper bounding check first, or whether the color update could be throttled to every other frame without a visible quality loss. It is also useful for extending the effect: ask it to make the field attract toward the cursor instead of repelling, support multiple simultaneous repulsion points for multi-touch devices, or arrange the resting grid into a logo or text shape instead of a plain rectangle. Treat the code less like a finished artifact and more like a starting point for a conversation.
Prompt to recreate it
Copy this into your AI assistant of choice to build the effect from scratch, or as a jumping-off point for your own variant:
Build a "magnetic particle field" in plain HTML, CSS, and JavaScript using Three.js loaded from a CDN (no bundler, no build step) — a grid of particles that repel away from the cursor and spring back to their resting positions.

Requirements:
- A full-viewport canvas with a WebGLRenderer sized to match it, updated on window resize including camera aspect ratio.
- Create a completely invisible plane mesh (a material with visibility disabled) positioned at the same depth as the particle grid, used purely as a raycast target to convert the 2D cursor position into a 3D point on that plane.
- Build a grid of at least 2,000 particles as a single THREE.Points object backed by one BufferGeometry, where each particle stores three things: its current position (in the geometry's position attribute), a separate saved "home" position matching its original grid slot, and a separate velocity value.
- Track the cursor's position with pointermove and pointerleave events, converting screen coordinates into normalized device coordinates, and every frame cast a ray through those coordinates to find its intersection with the invisible plane (if the cursor is not currently over the canvas, treat there as being no active cursor position).
- Every animation frame, for every particle: add a spring force to its velocity proportional to the vector from its current position to its saved home position (pulling it back toward home); if a cursor position is currently active and the particle is within a fixed radius of it, add an additional repulsion force to its velocity pointing directly away from the cursor position, scaled so particles closer to the cursor are pushed harder than particles near the edge of the radius; then multiply the particle's entire velocity by a damping factor less than 1 (applied unconditionally, every frame); finally add the resulting velocity to the particle's position.
- Color each particle based on its current velocity magnitude, so particles actively being pushed or springing back appear visibly brighter than particles that are stationary at or near their home position.
Want to tighten it up first? Run this prompt through the AI Prompt Studio to score it across 8 quality dimensions, catch anti-patterns, and tune the wording for Claude, ChatGPT, or Gemini before you paste it in.
Step by step
How to Use
- 1Load the Three.js CDNAdd three.min.js from the CDN panel — Raycaster is part of core Three.js.
- 2Paste HTML, CSS, and JSA flat grid of particles appears; move your cursor over it to see the effect.
- 3Move your cursor aroundNearby particles are pushed away and glow brighter while displaced.
- 4Move away and watch it healParticles spring smoothly back to their resting grid positions once undisturbed.
- 5Tune the repulsionAdjust REPEL_RADIUS and REPEL_STRENGTH for a wider, gentler, or more localized, forceful push.
- 6Tune the spring feelRaise SPRING for a snappier return, or raise DAMPING (closer to 1) for a slower, floatier settle.
Real-world uses
Common Use Cases
Got questions?
Frequently Asked Questions
A completely invisible plane mesh sits at the same Z position as the particle grid. Every frame, a Raycaster is cast from the camera through the cursor's normalized screen coordinates, and its intersection with that invisible plane gives an exact 3D point on the particle grid's own plane — even though the plane itself never renders anything.
Every particle stores its own resting "home" position from when the grid was first built. Each frame, a spring force proportional to the distance between a particle's current position and its home position is added to its velocity, constantly pulling it back — this force runs regardless of whether the cursor is nearby, so once repulsion stops, the spring force alone eventually returns the particle home.
Without constant damping, the spring force alone would cause every particle to oscillate back and forth around its home position indefinitely, like a frictionless pendulum. Multiplying velocity by a factor just under 1 every single frame bleeds off a small amount of energy continuously, which is what allows particles to actually settle into place rather than overshoot forever.
Tying brightness to how fast a particle is currently moving highlights the active, in-motion disturbance more clearly than tying it to distance from home would. A particle that has already been pushed far away but is now stationary reads as "settled," while a particle currently accelerating away from the cursor reads as visibly brighter and more active.
Yes. Raise REPEL_RADIUS to affect particles further from the cursor, and raise REPEL_STRENGTH for a more forceful push within that radius. Adjust SPRING and DAMPING alongside them to keep the return-to-home motion feeling proportionate to the new repulsion strength.
Yes. Click JSX for a React component, Vue for a Vue 3 SFC, Angular for a standalone component, or Tailwind for a React + Tailwind CSS utility-class version. Attach the pointermove and pointerleave listeners to the canvas ref inside a mount effect, keep the velocity and home arrays in refs, and call renderer.dispose() plus remove the listeners on cleanup.