

Learn Coding Visually
Learn to code with interactive, live-preview playgrounds — HTML, CSS, JavaScript, React & more.
 HTML Playground42 lessons · Click-based · Live preview
 CSS PlaygroundLearn CSS with a live editor
 JavaScript Playground60 lessons · DOM · Async · Canvas
 React PlaygroundLearn React with a live code editor
 GSAP PlaygroundLearn GSAP animation interactively
 SVG Playground44 lessons · shapes · paths · animation
 SCSS Playground45 lessons · Sass modules · tokens
 Tailwind PlaygroundLearn Tailwind CSS with a live editor
 Bootstrap 5 Playground50 lessons · live preview
Scroll Polaroid Stack Flip — Free HTML CSS JS Snippet
Scroll Polaroid Stack Flip · Scroll · Plain HTML, CSS & JS · Live preview
What's included
Features
About this UI Snippet
Scroll Polaroid Stack Flip — getBoundingClientRect Targeting & 3D Peel-and-Settle Motion
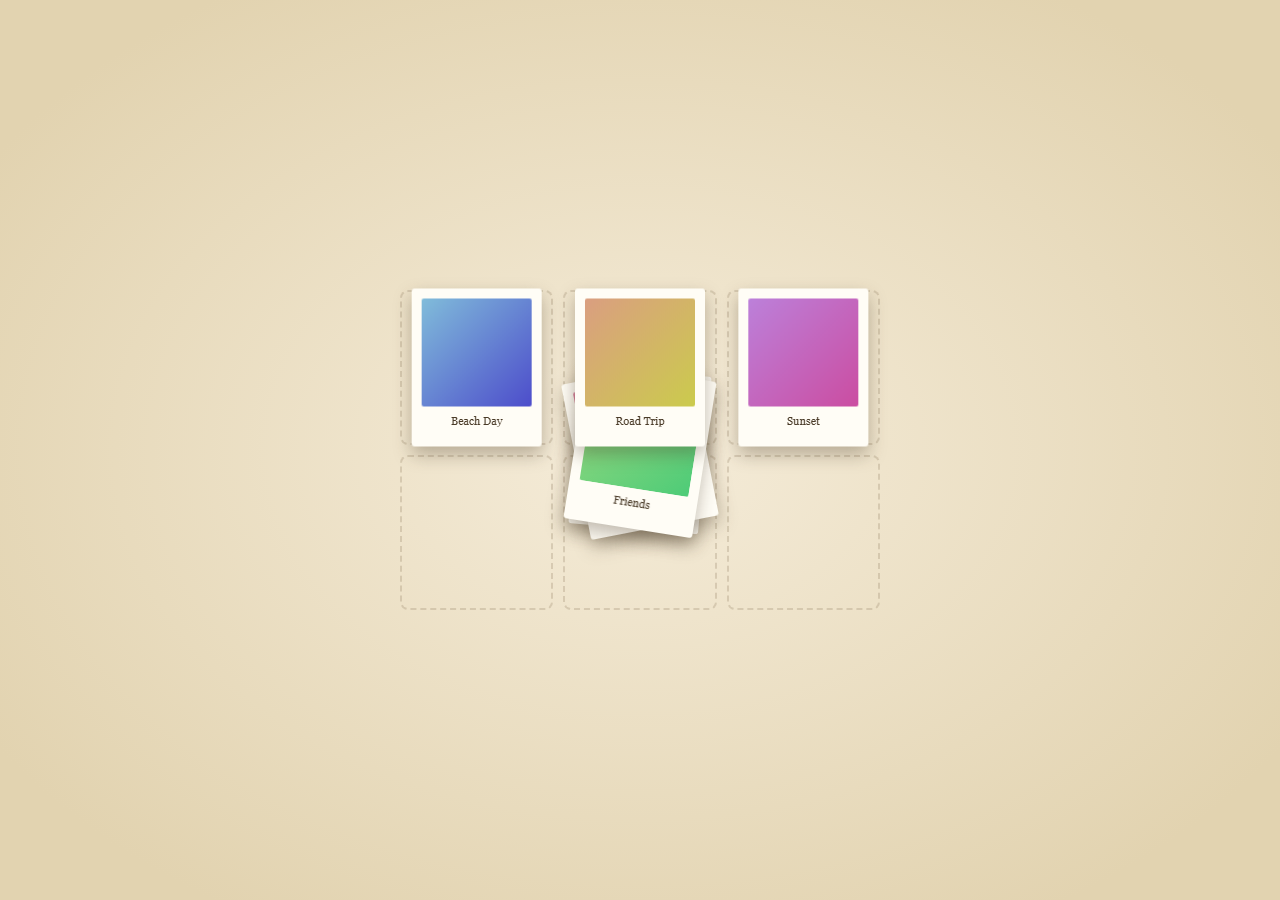
This snippet starts with a messy pile of randomly-rotated polaroid photo cards and, as the user scrolls, peels them off one at a time with a subtle 3D lift before flying each one into its own cell of a neat underlying grid — a satisfying "getting organized" transformation.
Randomized resting rotation via CSS custom properties
Each .polaroid sets its own --mr (mess rotation) custom property consumed by transform: rotate(var(--mr)), giving the initial pile a natural, hand-tossed look where no two photos sit at the same angle — all defined inline in the HTML so the messy arrangement is easy to art-direct per photo.
Measuring real target positions with getBoundingClientRect
Rather than hardcoding each photo's final grid position, a hidden .grid-slots CSS Grid layout defines the actual target cells, and getSlotOffset() measures the pixel offset from the stack's origin to each slot using getBoundingClientRect() at runtime — so the grid can be reflowed (different columns, gaps, or a responsive breakpoint) without ever touching the animation's position math.
Two-part motion per card: peel, then settle
Each polaroid's segment is split into two tweens: first a small lift-and-tilt (rotateX: -40, scale: 1.05, a negative y and boosted zIndex) simulating a card being physically picked up off the pile with a 3D peel using transform-style: preserve-3d and the stage's perspective, then a second tween flying it to its measured grid offset while resetting rotation and scale to flat and neutral — reading as the photo being placed down into its slot.
Sequential ordering via fractional timeline segments
The familiar segStart = i / n pattern (also used in Scroll Book Shelf Slide and Scroll Terrain Contour Lines) gives each polaroid its own slice of the scroll range so they peel and settle one after another rather than all at once, with ascending zIndex ensuring later cards in the original stack visually sit on top while still in the pile.
Fully reversible
Every tween lives on one scrub: true timeline, so scrolling back up lifts each photo back out of its grid slot, tilts it back in 3D, and drops it back into its messy pile position and rotation — undoing the sort in reverse order.
Pair this with Scroll Card Deck Shuffle for a related stack-transformation technique.
Build with AI
Build, Understand, Optimize, and Extend It With AI
Paste this snippet's HTML, CSS and JS into an AI coding assistant and ask it to explain why getSlotOffset() measures grid positions with getBoundingClientRect at runtime instead of hardcoding each polaroid's final x/y — the answer is about keeping the animation correct across any grid layout or screen size without touching the JS. It's a good one to extend with an assistant's help: ask it to make the grid responsive (fewer columns on mobile) while keeping the animation targeting correct, to add a subtle random landing-rotation to each photo once it settles into its slot for extra realism, or to add a real 3D flip (rotateY 180 degrees) revealing a caption on the back of each polaroid as it settles.
Prompt to recreate it
Copy this into your AI assistant of choice to build the effect from scratch, or as a jumping-off point for your own variant:
Build a scroll-driven "polaroid stack sorts into a grid" animation in HTML, CSS and JavaScript using GSAP and ScrollTrigger — no canvas, no WebGL.

Requirements:
- Render a small messy pile of absolutely-positioned "polaroid" photo card divs, all stacked at the same origin point, each given its own randomized rotation via an inline CSS custom property so the pile looks naturally hand-tossed, plus ascending z-index matching their stacking order.
- Separately define a hidden CSS Grid of "slot" placeholder elements representing the neat final target layout (e.g. 3 columns by 2 rows).
- Write a helper function that measures each slot's actual rendered position relative to the stack's origin using getBoundingClientRect, so the animation always targets real layout positions rather than hardcoded coordinates.
- Wrap the stack in a tall scroll section and, using one GSAP timeline attached via ScrollTrigger with scrub: true, give each polaroid its own fractional slice of the scroll range containing two sequential tweens: first a small 3D "peel" lift (negative rotateX with a perspective set on the parent, a slight scale up, a small y lift, and a boosted z-index) simulating the card being picked up off the pile, then a second tween flying it to its measured grid slot position while resetting rotation, rotateX and scale back to neutral, so it reads as the photo settling flat into its slot.
- The whole sequence must animate forward and reverse cleanly as the user scrolls down and back up, lifting cards back out of the grid and returning them to their messy pile positions and rotations.
- Use a warm cream and kraft-paper color palette with soft drop shadows for depth.
Want to tighten it up first? Run this prompt through the AI Prompt Studio to score it across 8 quality dimensions, catch anti-patterns, and tune the wording for Claude, ChatGPT, or Gemini before you paste it in.
Source Code
<div class="hint">Scroll ↓ to sort the photo stack</div>
<div class="polaroid-wrap">
  <div class="polaroid-stage">
    <div class="grid-slots" id="gridSlots">
      <div class="slot" style="--gx:0;--gy:0"></div>
      <div class="slot" style="--gx:1;--gy:0"></div>
      <div class="slot" style="--gx:2;--gy:0"></div>
      <div class="slot" style="--gx:0;--gy:1"></div>
      <div class="slot" style="--gx:1;--gy:1"></div>
      <div class="slot" style="--gx:2;--gy:1"></div>
    </div>
    <div class="stack" id="stack">
      <div class="polaroid" style="--hue:200;--mr:-8deg" data-photo="1"><div class="photo"></div><div class="caption">Beach Day</div></div>
      <div class="polaroid" style="--hue:20;--mr:6deg" data-photo="2"><div class="photo"></div><div class="caption">Road Trip</div></div>
      <div class="polaroid" style="--hue:280;--mr:-4deg" data-photo="3"><div class="photo"></div><div class="caption">Sunset</div></div>
      <div class="polaroid" style="--hue:100;--mr:9deg" data-photo="4"><div class="photo"></div><div class="caption">Friends</div></div>
      <div class="polaroid" style="--hue:340;--mr:-11deg" data-photo="5"><div class="photo"></div><div class="caption">Camping</div></div>
      <div class="polaroid" style="--hue:50;--mr:5deg" data-photo="6"><div class="photo"></div><div class="caption">City Lights</div></div>
    </div>
  </div>
</div>
* { box-sizing: border-box; }
body { margin: 0; font-family: 'Georgia', serif; background: #ede3d0; }
.hint { text-align: center; padding: 28px 16px; font-size: 14px; color: #8a7a5c; font-family: system-ui, sans-serif; }
.polaroid-wrap { height: 500vh; position: relative; }
.polaroid-stage { position: sticky; top: 0; height: 100vh; display: flex; align-items: center; justify-content: center; overflow: hidden; background: radial-gradient(ellipse at 50% 50%, #f5ecd9, #e2d3b0 85%); perspective: 1200px; }
.grid-slots { position: relative; width: min(480px, 86vw); height: min(320px, 58vw); display: grid; grid-template-columns: repeat(3, 1fr); grid-template-rows: repeat(2, 1fr); gap: 10px; }
.slot { border: 2px dashed rgba(138,122,92,0.25); border-radius: 8px; }
.stack { position: absolute; top: 50%; left: 50%; width: 130px; height: 158px; margin: -79px 0 0 -65px; }
.polaroid { position: absolute; top: 0; left: 0; width: 130px; height: 158px; background: #fffdf6; padding: 10px 10px 26px; border-radius: 3px; box-shadow: 0 8px 18px rgba(74,59,40,0.35); transform: rotate(var(--mr)); transform-style: preserve-3d; }
.photo { width: 100%; height: 108px; background: linear-gradient(135deg, hsl(var(--hue) 55% 68%), hsl(calc(var(--hue) + 40) 55% 55%)); border-radius: 2px; }
.caption { text-align: center; font-size: 11px; color: #4a3b28; margin-top: 8px; font-family: 'Georgia', serif; }
@media (max-width: 640px) {
.grid-slots { width: 92vw; height: 62vw; gap: 6px; }
.stack { width: 100px; height: 124px; margin: -62px 0 0 -50px; }
.polaroid { width: 100px; height: 124px; padding: 7px 7px 20px; }
.photo { height: 82px; }
.caption { font-size: 9px; margin-top: 5px; }
}gsap.registerPlugin(ScrollTrigger);
const polaroids = gsap.utils.toArray('.polaroid');
const slots = gsap.utils.toArray('.slot');
const gridSlots = document.getElementById('gridSlots');
const n = polaroids.length;
gsap.set(polaroids, { zIndex: (i) => n - i });
function getSlotOffset(index) {
const slot = slots[index];
const stackRect = document.getElementById('stack').getBoundingClientRect();
const slotRect = slot.getBoundingClientRect();
return {
x: slotRect.left - stackRect.left + (slotRect.width - 130) / 2,
y: slotRect.top - stackRect.top + (slotRect.height - 158) / 2,
};
}
const tl = gsap.timeline({
scrollTrigger: {
trigger: '.polaroid-wrap',
start: 'top top',
end: 'bottom bottom',
scrub: true,
},
});
polaroids.forEach((card, i) => {
const segStart = i / n;
const segEnd = segStart + (1 / n) * 0.85;
const offset = getSlotOffset(i);
tl.to(card, {
y: -30 - i * 4,
rotateX: -40,
scale: 1.05,
zIndex: n + 5,
ease: 'none',
duration: (segEnd - segStart) * 0.4,
}, segStart)
.to(card, {
x: offset.x,
y: offset.y,
rotate: 0,
rotateX: 0,
scale: 1,
ease: 'none',
duration: (segEnd - segStart) * 0.6,
}, segStart + (segEnd - segStart) * 0.4);
});
ScrollTrigger.refresh();Step by step
How to Use
- 1Scroll through the previewScroll down slowly — each polaroid lifts off the messy pile with a 3D tilt, then flies into its own slot in the neat grid below.
- 2Add or remove photosAdd a .polaroid element to #stack with its own --hue and --mr custom properties, and a matching .slot element to #gridSlots — the JS reads both arrays' lengths automatically.
- 3Use real photosReplace the .photo div's gradient background with an <img> or background-image pointing at your own image.
- 4Change the grid layoutEdit grid-template-columns/rows on .grid-slots — getSlotOffset() measures actual rendered slot positions, so any grid layout works without touching the JS.
- 5Adjust the peel height and tiltChange the rotateX, scale and y values in the first tween of each card's segment to make the peel more or less dramatic.
- 6Export in your formatClick "HTML" for a standalone file, "JSX" for a React component, or "Tailwind" for a React + Tailwind version.
Real-world uses
Common Use Cases
Got questions?
Frequently Asked Questions
A hidden CSS Grid of .slot elements defines the real target layout. getSlotOffset() measures each slot's position relative to the stack's origin with getBoundingClientRect() at runtime, so the animation always targets the grid's actual rendered position rather than a hardcoded coordinate.
The stage has a CSS perspective set, each card has transform-style: preserve-3d, and the first tween in each card's segment applies a negative rotateX along with a slight scale-up and lift — combined, this reads as the card tilting up and off the pile in 3D before flying to its slot.
Yes — edit grid-template-columns/rows on .grid-slots and add matching .slot elements; since positions are measured live with getBoundingClientRect, no animation code needs to change.
Replace each .photo div's CSS gradient background with a background-image or swap it for an <img> tag sized to fill the same area — the surrounding polaroid frame and caption styling stay the same.
Call ScrollTrigger.refresh() after a resize (or listen for a resize event) so getSlotOffset() re-measures the slots' new positions; the snippet already calls refresh() once on load to establish correct initial positions.