Learn Coding Visually
Learn to code with interactive, live-preview playgrounds — HTML, CSS, JavaScript, React & more.
 HTML Playground42 lessons · Click-based · Live preview
 CSS PlaygroundLearn CSS with a live editor
 JavaScript Playground60 lessons · DOM · Async · Canvas
 React PlaygroundLearn React with a live code editor
 GSAP PlaygroundLearn GSAP animation interactively
 SVG Playground44 lessons · shapes · paths · animation
 SCSS Playground45 lessons · Sass modules · tokens
 Tailwind PlaygroundLearn Tailwind CSS with a live editor
 Bootstrap 5 Playground50 lessons · live preview
Scroll Thread Stitch Reveal — SVG Needle-and-Thread Draw-On Effect
Scroll Thread Stitch Reveal · Scroll · Plain HTML, CSS & JS · Live preview
What's included
Features
About this UI Snippet
How to Build a Scroll-Driven Embroidery Stitch Reveal With SVG and GSAP
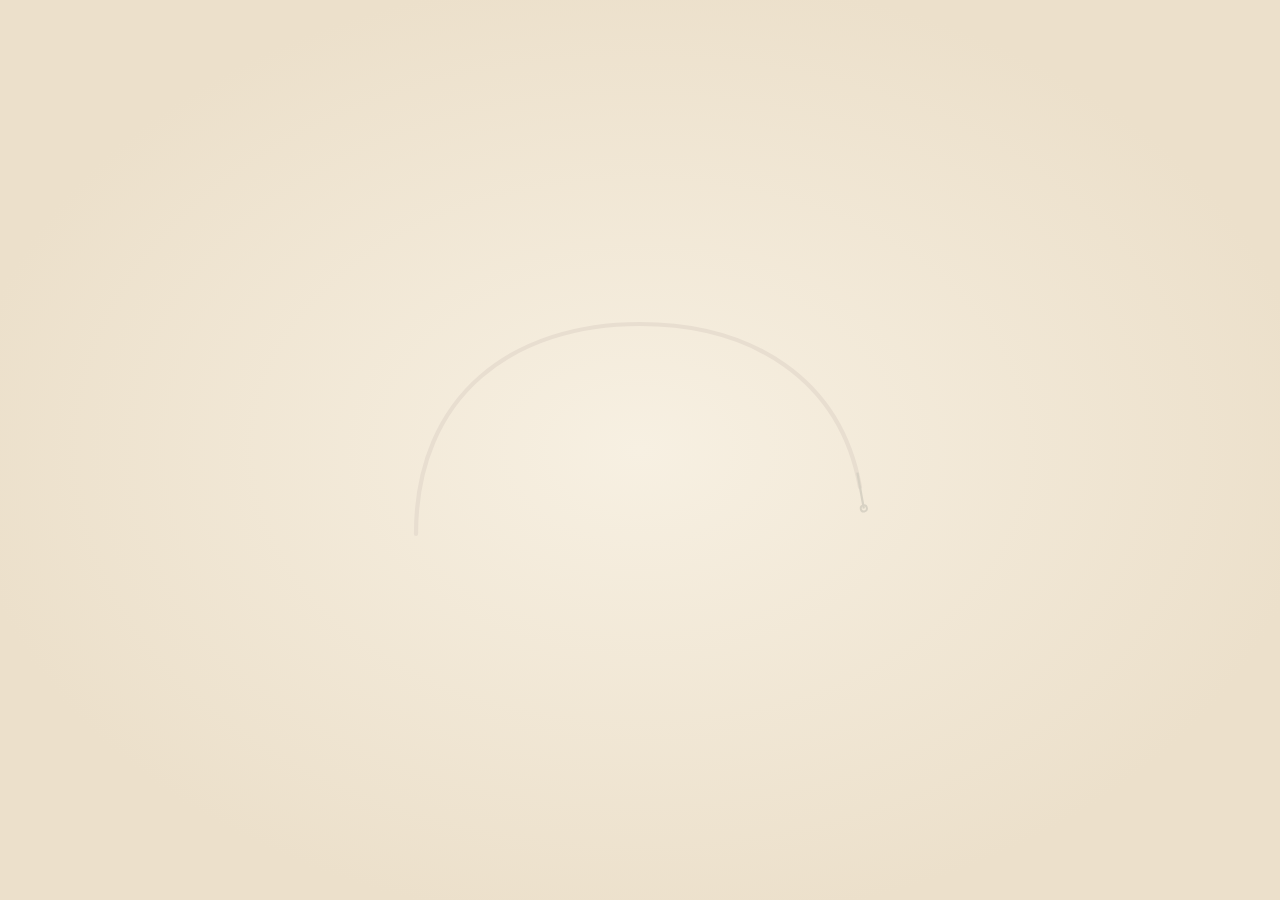
The Scroll Thread Stitch Reveal snippet draws a dashed "stitch" outline along an SVG path as the visitor scrolls through a pinned stage, tracks a needle-and-thread icon exactly at the growing tip of that stitch line, and finally fades in a filled embroidered shape underneath once the outline is complete.
A dashed stroke as the stitch pattern itself
Rather than a solid drawn line like scroll svg path draw, this snippet sets stroke-dasharray="6 6" on the outline path so the visible stroke already reads as individual thread stitches rather than a continuous line. The draw-on reveal still uses the standard stroke-dashoffset technique — stroke-dasharray is set a second time, programmatically, to the path's full length via getTotalLength(), and stroke-dashoffset animates from that length down to zero — but because the dash pattern renders as short segments, the result looks like a needle laying individual stitches rather than drawing a solid curve.
getPointAtLength keeps the needle glued to the thread's tip
Instead of animating the needle along a separately authored motion path, every frame reads the exact SVG coordinate at the stitch line's current drawn length using path.getPointAtLength(progress * totalLength) — the same API the browser uses internally to render the dashed stroke. Sampling a second point one unit further along and taking atan2 of the difference gives a tangent angle, so the needle icon also rotates to always point along the direction of travel, not just translate to the right spot.
Two phases inside one scrubbed timeline
A single gsap.timeline() holds the stitch-drawing tween across the first 90% of its duration and the filled-shape fade-in across the final 25% (deliberately overlapping the tail of the stitching), so the fill only appears once the outline is nearly finished — like the last few stitches closing a shape being what finally reveals the embroidered motif underneath, rather than the fill appearing on an unrelated timer.
Needle rotation and position computed in onUpdate, not a second tween
Because the needle's position and rotation both need to be a function of the exact same stitch progress value used for the dashoffset (to stay perfectly glued to the tip), they are computed directly inside the ScrollTrigger's own onUpdate callback using self.progress, rather than as a separate GSAP tween that could drift out of sync with the dash animation's easing.
Reversibility for free
Every visual property here — dashoffset, needle transform, fill opacity — is a pure function of the current scrubbed progress value. Scrolling back up threads the needle back along the path exactly retracing its steps and fades the fill back out, with no additional state or reverse-specific logic required.
Build with AI
Build, Understand, Optimize, and Extend It With AI
You do not need a dedicated path-animation library to understand how this embroidery stitches itself on scroll. Paste this snippet's HTML, CSS, and JS into an AI assistant like Claude and ask it to explain why getPointAtLength is called twice per update to compute a tangent angle, or why the fill-reveal tween deliberately overlaps the tail of the stitch-drawing tween instead of starting after it finishes. The same assistant can help you extend it — ask it to add a subtle thread color change partway through the path, vary dash length for coarser or finer stitches, or add a second embroidered motif that stitches in after the first completes. It can also help optimize further, for instance caching getPointAtLength samples at fixed intervals if the path is very long and getPointAtLength calls become a bottleneck. Treat the code as a conversation starter, not a finished artifact.
Prompt to recreate it
Copy this into your AI assistant of choice to build the effect from scratch, or as a jumping-off point for your own variant:
Build a "scroll-scrubbed embroidery stitch reveal" in plain HTML, CSS, and JavaScript using inline SVG, GSAP, and GSAP's ScrollTrigger plugin, all loaded from a CDN (no bundler, no build step, no canvas).

Requirements:
- A pinned section containing an inline SVG with two identical copies of the same closed path shape: one with fill only (initially opacity 0) representing the finished embroidered motif, and one with no fill and a dashed stroke (via CSS stroke-dasharray, e.g. "6 6") representing the stitch outline.
- On load, use the stitch path's getTotalLength() method to set its stroke-dasharray and stroke-dashoffset both to its full length, so it starts completely undrawn (the standard SVG draw-on setup).
- Add a small needle-and-thread icon (a short line plus a small circle "eye", grouped) positioned via an SVG transform.
- Build one gsap.timeline() attached to a ScrollTrigger on the pinned section, with pin: true, start at top top, a numeric scrub, and a multi-hundred-percent end. Animate the stitch path's stroke-dashoffset down to 0 across most of the timeline's duration, then fade in the filled shape's opacity during the final portion, overlapping the tail of the stitching animation.
- Inside the ScrollTrigger's onUpdate callback, compute the current stitch progress (clamped to the stitching phase), call the stitch path's getPointAtLength at that progress times the total length to get the needle's exact current position, sample a second point slightly further along the path to compute a direction angle via Math.atan2, and apply both as a translate-and-rotate transform on the needle group so it stays glued to the tip of the growing stitch line and points in its direction of travel.
- Add a text caption that fades in only once the stitching and fill are both essentially complete.
- Confirm scrolling back up un-stitches the outline and fades the fill back out exactly in reverse, with the needle re-threading backward along the path, since every visual property is a pure function of the current scrubbed progress value.
Want to tighten it up first? Run this prompt through the AI Prompt Studio to score it across 8 quality dimensions, catch anti-patterns, and tune the wording for Claude, ChatGPT, or Gemini before you paste it in.
Source Code
<section class="stc-stage" id="stcStage">
  <div class="stc-intro"><p>Scroll ↓ to stitch the embroidery into place</p></div>
  <svg class="stc-svg" id="stcSvg" viewBox="0 0 400 260" preserveAspectRatio="xMidYMid meet">
    <defs>
      <clipPath id="stcClip">
        <path id="stcFillPath" d="M40,190 C40,90 110,40 200,40 C290,40 360,90 360,190 C360,210 200,230 200,230 C200,230 40,210 40,190 Z"></path>
      </clipPath>
    </defs>
    <path id="stcFilled" d="M40,190 C40,90 110,40 200,40 C290,40 360,90 360,190 C360,210 200,230 200,230 C200,230 40,210 40,190 Z" fill="#b3432b" opacity="0"></path>
    <path id="stcStitch" d="M40,190 C40,90 110,40 200,40 C290,40 360,90 360,190 C360,210 200,230 200,230 C200,230 40,210 40,190 Z" fill="none" stroke="#e8ded0" stroke-width="3" stroke-dasharray="6 6" stroke-linecap="round"></path>
    <g id="stcNeedle">
      <line x1="0" y1="-16" x2="0" y2="10" stroke="#d8d2c4" stroke-width="1.6"></line>
      <circle cx="0" cy="-16" r="2.2" fill="none" stroke="#d8d2c4" stroke-width="1.4"></circle>
    </g>
  </svg>
  <div class="stc-caption" id="stcCaption">Hand-Stitched</div>
</section>
<section class="stc-bottom"><p>Fully embroidered.</p></section>*{box-sizing:border-box;margin:0;padding:0}
html,body{background:#f2e9da;color:#3a2c1e;font-family:system-ui,-apple-system,sans-serif}
.stc-bottom{min-height:70vh;display:flex;justify-content:center;align-items:center;color:#a08a68;font-size:15px;letter-spacing:.08em;text-transform:uppercase;text-align:center;padding:0 24px}
.stc-stage{height:100vh;position:relative;overflow:hidden;display:flex;align-items:center;justify-content:center;background:radial-gradient(ellipse at center,#f7f0e2 0%,#ece0cb 75%)}
.stc-intro{position:absolute;top:10%;left:0;right:0;display:flex;justify-content:center;text-align:center;padding:0 24px;pointer-events:none;z-index:6;color:#8a5a3a;font-size:15px;letter-spacing:.08em;text-transform:uppercase;transition:opacity .4s ease;}
.stc-svg{width:min(80vw,560px);height:auto}
#stcNeedle{transition:none}
.stc-caption{position:absolute;bottom:14%;left:0;right:0;text-align:center;font-size:15px;letter-spacing:.28em;color:#8a3b2e;opacity:0;transition:opacity .6s ease;text-transform:uppercase}
.stc-caption.visible{opacity:1}gsap.registerPlugin(ScrollTrigger);
var stitchPath = document.getElementById('stcStitch');
var fillPath = document.getElementById('stcFilled');
var needle = document.getElementById('stcNeedle');
var caption = document.getElementById('stcCaption');
var introEl = document.querySelector('.stc-intro');
var totalLen = stitchPath.getTotalLength();
stitchPath.setAttribute('stroke-dasharray', totalLen);
stitchPath.setAttribute('stroke-dashoffset', totalLen);
var tl = gsap.timeline({
scrollTrigger: {
trigger: '#stcStage',
start: 'top top',
end: '+=420%',
scrub: 0.6,
pin: true,
onUpdate: function (self) {
if (introEl) introEl.style.opacity = (self.progress > 0.02) ? '0' : '1';
caption.classList.toggle('visible', self.progress > 0.95);
// Move the needle-and-thread icon along the path using the SVG DOM's
// own getPointAtLength, so it always sits exactly at the tip of the
// currently stitched line, never drifting out of sync with the dash.
var stitchProgress = Math.min(self.progress / 0.9, 1);
var pt = stitchPath.getPointAtLength(stitchProgress * totalLen);
var ptNext = stitchPath.getPointAtLength(Math.min(totalLen, stitchProgress * totalLen + 1));
var angle = Math.atan2(ptNext.y - pt.y, ptNext.x - pt.x) * (180 / Math.PI);
needle.setAttribute('transform', 'translate(' + pt.x.toFixed(2) + ',' + pt.y.toFixed(2) + ') rotate(' + (angle + 90).toFixed(2) + ')');
needle.style.opacity = stitchProgress < 0.999 ? '1' : '0';
},
},
});
// Phase 1 (0 -> 0.9 of timeline): the dashed stitch line draws on along the
// path, tip tracked by the needle in the ScrollTrigger onUpdate above.
tl.to(stitchPath, { strokeDashoffset: 0, duration: 0.9, ease: 'none' }, 0);
// Phase 2 (0.75 -> 1): the filled embroidered shape fades in underneath the
// completed stitch outline, revealing the finished motif.
tl.to(fillPath, { opacity: 1, duration: 0.25, ease: 'power1.in' }, 0.75);Step by step
How to Use
- 1Load the two GSAP CDN scriptsAdd gsap.min.js and ScrollTrigger.min.js from the CDN panel, in that order.
- 2Paste HTML, CSS, and JSAn unstitched outline appears inside a pinned stage with the needle icon parked at its start.
- 3Scroll downThe dashed stitch line draws on with the needle tracking its tip, then the filled embroidered shape fades in underneath.
- 4Reach the endA "Hand-Stitched" caption fades in once the motif is fully embroidered.
- 5Scroll back upThe caption and fill fade out and the needle re-threads the outline backward exactly in reverse.
- 6Swap the motifReplace the d attribute on #stcStitch and #stcFilled (keep them identical) with your own SVG path.
Real-world uses
Common Use Cases
Got questions?
Frequently Asked Questions
The path's CSS stroke-dasharray is authored as "6 6" (a repeating 6px dash, 6px gap pattern), so the rendered stroke already looks like individual thread stitches rather than a continuous curve. The draw-on animation still works by separately setting stroke-dasharray to the path's full length in JavaScript and animating stroke-dashoffset — CSS and the JS-set attribute combine so the stitches themselves reveal progressively.
Every ScrollTrigger update calls the path element's own getPointAtLength(progress * totalLength) — the same coordinate math the browser itself uses to render the dashed stroke — so the needle is always positioned at the literal current end of the drawn portion, with no separate motion path to keep in sync.
The update callback samples a second point one unit further along the path and computes the angle between it and the current tip point using Math.atan2. That angle is applied as the needle group's rotation, so it visibly points in the direction of travel rather than staying at a fixed orientation while it moves.
The fill-in tween begins at 75% through the timeline while the stitch-drawing tween runs through 90%, so the two phases deliberately overlap for the final quarter of the sequence. This makes the fill read as the payoff of the last few stitches closing the shape, rather than appearing on an unrelated schedule disconnected from the stitching progress.
Yes. Click JSX for a React component, Vue for a Vue 3 SFC, Angular for a standalone component, or Tailwind for a React + Tailwind version. Build the SVG refs and timeline inside a mount effect, and on unmount kill the ScrollTrigger instance so the pin does not leak between route changes.