Learn Coding Visually
Learn to code with interactive, live-preview playgrounds — HTML, CSS, JavaScript, React & more.
 HTML Playground42 lessons · Click-based · Live preview
 CSS PlaygroundLearn CSS with a live editor
 JavaScript Playground60 lessons · DOM · Async · Canvas
 React PlaygroundLearn React with a live code editor
 GSAP PlaygroundLearn GSAP animation interactively
 SVG Playground44 lessons · shapes · paths · animation
 SCSS Playground45 lessons · Sass modules · tokens
 Tailwind PlaygroundLearn Tailwind CSS with a live editor
 Bootstrap 5 Playground50 lessons · live preview
GLightbox Mixed Media Lightbox — Free JS Snippet
GLightbox Mixed Media Lightbox (Image, Video and HTML) · Media · Plain HTML, CSS & JS · Live preview
What's included
Features
About this UI Snippet
GLightbox Mixed Media Lightbox — HTML, CSS & JavaScript
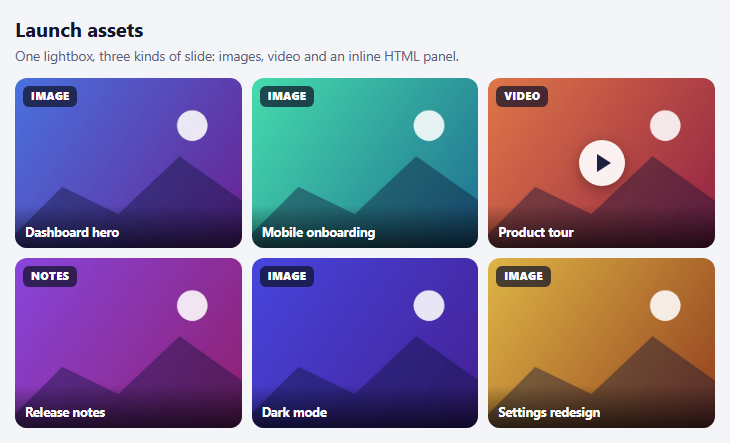
Most lightbox demos show a wall of photos. Real content is messier: a product launch page has screenshots, a walkthrough video and a block of release notes, and forcing each into its own modal means three different interaction patterns for what a visitor thinks of as one collection. GLightbox treats slides as typed objects — image, video, iframe or inline HTML — so one lightbox can move between all of them with the same swipe and keyboard behaviour.
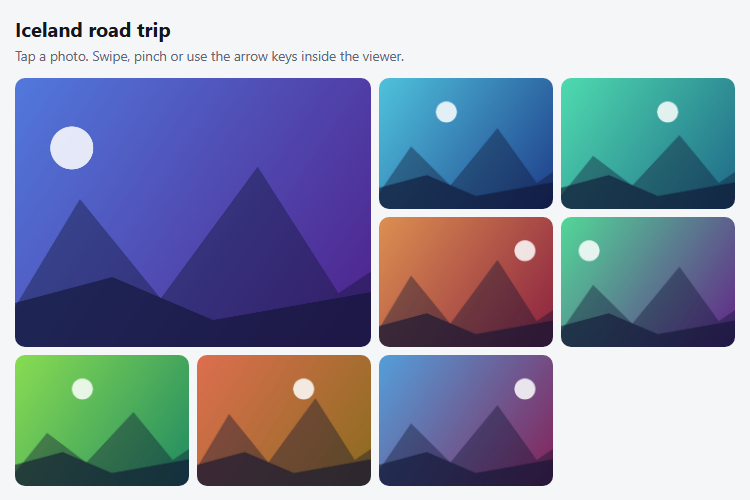
There are two ways to feed it. The declarative way is to add class="glightbox" links and let it discover them. This snippet uses the programmatic way, passing an elements array where each slide states its own type: an image with a title and description, a video with source: 'local' and a width, and an inline slide whose content is the HTML of a hidden element. The array approach matters because it decouples the thumbnail grid from the lightbox. The grid here is custom-styled buttons with badges and a play glyph, and a click handler calls lightbox.openAt(index), so the tiles can look like anything without being anchor tags.
Inline slides are the underrated feature. The release notes panel is ordinary HTML — a heading, a list and a button with a click handler — rendered inside the lightbox and still interactive, which is useful for forms, sign-up prompts and rich detail views that a bare image cannot carry. Two configuration choices are worth copying: autoplayVideos is false, so a video never starts making noise without a deliberate click, and loop wraps navigation so the arrows never dead-end.
GLightbox handles touch swipe, pinch zoom on images, drag to close and keyboard control, and it needs no dependencies. The demo video is a public CC0 clip loaded from a URL; if you host your own, use the local source type for MP4 files, or youtube and vimeo for embeds, which GLightbox wraps in a responsive frame. The thumbnails and images are generated on canvases so the layout works offline.
Build with AI
Build, Understand, Optimize, and Extend It With AI
Ask an AI assistant like Claude to add a YouTube slide, pause a playing video when the user navigates away, or add a thumbnail strip along the bottom of the lightbox.
Prompt to recreate it
Copy this into your AI assistant of choice to build the effect from scratch, or as a jumping-off point for your own variant:
Build a mixed-media lightbox with GLightbox 3 loaded from a CDN (script and CSS).

Requirements:
- Create one GLightbox instance from an elements array containing image slides, a local MP4 video slide (source: 'local') and an inline HTML slide whose content comes from a hidden element.
- Render a custom thumbnail grid of buttons with a type badge and a play icon for video, and open the lightbox with openAt(index).
- Set touchNavigation, loop, keyboardNavigation, zoomable and autoplayVideos: false.
- Make the inline slide contain a list and a button that remains interactive.
- Generate thumbnails and images on canvases; give each button an aria-label describing its media type.
Want to tighten it up first? Run this prompt through the AI Prompt Studio to score it across 8 quality dimensions, catch anti-patterns, and tune the wording for Claude, ChatGPT, or Gemini before you paste it in.
Source Code
<div class="gl-wrap">
<h3>Launch assets</h3>
<p class="gl-sub">One lightbox, three kinds of slide: images, video and an inline HTML panel.</p>
<div class="gl-grid" id="glGrid"></div>
</div>
<div id="glInfo" style="display:none">
<div class="gl-panel">
<h4>Release notes — v2.4</h4>
<ul>
<li>New timeline view with drag-to-reorder</li>
<li>Dark mode across every screen</li>
<li>40% faster cold start</li>
</ul>
<button type="button" onclick="this.textContent='Still interactive!'">Try me</button>
</div>
</div>body { background: #f4f5f9; padding: 22px; font-family: system-ui, sans-serif; }
.gl-wrap { max-width: 700px; margin: 0 auto; }
.gl-wrap h3 { margin: 0; font-size: 20px; color: #12162a; }
.gl-sub { margin: 4px 0 14px; font-size: 13.5px; color: #5b6278; }
.gl-grid { display: grid; grid-template-columns: repeat(3, 1fr); gap: 10px; }
@media (max-width: 520px) { .gl-grid { grid-template-columns: repeat(2, 1fr); } }
.gl-tile { position: relative; aspect-ratio: 4 / 3; border: 0; padding: 0; border-radius: 12px; overflow: hidden; cursor: pointer; background: #dfe3ee; }
.gl-tile img { width: 100%; height: 100%; object-fit: cover; display: block; transition: transform .3s; }
.gl-tile:hover img { transform: scale(1.06); }
.gl-tile:focus-visible { outline: 3px solid #4f46e5; outline-offset: 2px; }
.gl-badge { position: absolute; top: 8px; left: 8px; font: 800 10.5px/1 system-ui, sans-serif; letter-spacing: .06em; text-transform: uppercase; color: #fff; background: rgba(15,18,40,.72); padding: 5px 8px; border-radius: 6px; }
.gl-play { position: absolute; inset: 0; display: grid; place-items: center; }
.gl-play i { width: 46px; height: 46px; border-radius: 50%; background: rgba(255,255,255,.92); display: grid; place-items: center; box-shadow: 0 4px 14px rgba(0,0,0,.3); }
.gl-play i::after { content: ''; margin-left: 4px; border-left: 14px solid #1c2140; border-top: 9px solid transparent; border-bottom: 9px solid transparent; }
.gl-name { position: absolute; left: 0; right: 0; bottom: 0; padding: 20px 10px 8px; text-align: left; font: 700 12.5px/1.2 system-ui, sans-serif; color: #fff; background: linear-gradient(transparent, rgba(0,0,0,.65)); }
.gl-panel { padding: 24px 28px; background: #fff; color: #171b33; border-radius: 12px; max-width: 420px; font-family: system-ui, sans-serif; }
.gl-panel h4 { margin: 0 0 10px; font-size: 18px; }
.gl-panel ul { margin: 0 0 16px; padding-left: 20px; line-height: 1.7; font-size: 14.5px; }
.gl-panel button { font: 700 13px/1 system-ui, sans-serif; color: #fff; background: #4f46e5; border: 0; border-radius: 9px; padding: 10px 16px; cursor: pointer; }function art(i, hues) {
const w = 1280, h = 853;
const c = document.createElement('canvas'); c.width = w; c.height = h;
const x = c.getContext('2d');
const g = x.createLinearGradient(0, 0, w, h);
g.addColorStop(0, 'hsl(' + hues[0] + ',72%,58%)'); g.addColorStop(1, 'hsl(' + hues[1] + ',66%,34%)');
x.fillStyle = g; x.fillRect(0, 0, w, h);
x.fillStyle = 'rgba(255,255,255,.88)'; x.beginPath(); x.arc(w * 0.75, h * 0.28, h * 0.09, 0, 7); x.fill();
x.fillStyle = 'rgba(15,20,55,.42)';
x.beginPath(); x.moveTo(0, h); x.lineTo(w * 0.24, h * (0.56 + (i % 2) * 0.08)); x.lineTo(w * 0.46, h * 0.8); x.lineTo(w * 0.7, h * 0.46); x.lineTo(w, h * 0.78); x.lineTo(w, h); x.fill();
return c.toDataURL('image/jpeg', 0.85);
}
// A tiny animated video made from a canvas would need MediaRecorder; a public CC0 clip keeps this simple.
const VIDEO = 'https://interactive-examples.mdn.mozilla.net/media/cc0-videos/flower.mp4';
const ITEMS = [
{ kind: 'image', name: 'Dashboard hero', desc: 'The redesigned overview screen', hues: [222, 280] },
{ kind: 'image', name: 'Mobile onboarding', desc: 'Three-step first-run flow', hues: [160, 200] },
{ kind: 'video', name: 'Product tour', desc: 'A 20-second walkthrough', hues: [20, 340] },
{ kind: 'inline', name: 'Release notes', desc: 'What changed in v2.4', hues: [265, 320] },
{ kind: 'image', name: 'Dark mode', desc: 'Every screen, after dark', hues: [240, 260] },
{ kind: 'image', name: 'Settings redesign', desc: 'Cleaner, searchable preferences', hues: [45, 15] },
];
const grid = document.getElementById('glGrid');
const elements = ITEMS.map(function (it) {
it.thumb = art(1, it.hues);
if (it.kind === 'image') return { href: it.thumb, type: 'image', title: it.name, description: it.desc };
if (it.kind === 'video') return { href: VIDEO, type: 'video', source: 'local', title: it.name, description: it.desc, width: '900px' };
return { content: document.getElementById('glInfo').innerHTML, type: 'inline', title: it.name, description: it.desc };
});
grid.innerHTML = ITEMS.map(function (it, i) {
const badge = it.kind === 'video' ? 'Video' : it.kind === 'inline' ? 'Notes' : 'Image';
return '<button type="button" class="gl-tile" data-i="' + i + '" aria-label="Open ' + it.name + ' (' + badge.toLowerCase() + ')">' +
'<img src="' + it.thumb + '" alt="">' + '<span class="gl-badge">' + badge + '</span>' +
(it.kind === 'video' ? '<span class="gl-play"><i></i></span>' : '') +
'<span class="gl-name">' + it.name + '</span></button>';
}).join('');
// One instance, driven by an array: each slide declares its own type.
const lightbox = GLightbox({
elements: elements,
touchNavigation: true,
loop: true,
keyboardNavigation: true,
closeOnOutsideClick: true,
zoomable: true,
draggable: true,
autoplayVideos: false, // never start playing without a click
videosWidth: '900px',
});
grid.addEventListener('click', function (e) {
const tile = e.target.closest('.gl-tile');
if (tile) lightbox.openAt(Number(tile.dataset.i));
});Step by step
How to Use
- 1Open an imageClick a tile marked Image. It opens in the lightbox with its title and description below.
- 2Move between slidesSwipe or press the arrow keys. The lightbox moves between image, video and notes slides seamlessly.
- 3Play the videoOpen the Product tour tile and press play; it never autoplays.
- 4Use the notes slideOpen Release notes. It is real HTML, and its button stays clickable inside the lightbox.
- 5Close itPress Escape, click outside the slide, click ×, or drag the slide away on a touch screen.
Real-world uses
Common Use Cases
Got questions?
Frequently Asked Questions
Pass an elements array to GLightbox. Each object sets its own type: "image", "video", "iframe" or "inline" with content.
Keep a reference to the instance and call lightbox.openAt(index) from your click handler.
Use type: "video" with source: "youtube" or "vimeo" and the video URL as href; GLightbox builds the embed.
Yes. Inline slides accept any HTML through the content property, and events inside it keep working.
Set autoplayVideos: false. Users then start playback themselves.
No. GLightbox is dependency-free vanilla JavaScript.
Yes. Use the JSX, Vue, Angular or Tailwind export buttons on this page to convert the markup and styles. The behaviour comes from GLightbox, so in a framework project install it with npm install glightbox instead of the CDN tag, create it in useEffect / onMounted / ngAfterViewInit, and release it with destroy() when the component unmounts.