You Might Also Like
Learn Coding Visually
Learn to code with interactive, live-preview playgrounds — HTML, CSS, JavaScript, React & more.
 HTML Playground42 lessons · Click-based · Live preview
 CSS PlaygroundLearn CSS with a live editor
 JavaScript Playground60 lessons · DOM · Async · Canvas
 React PlaygroundLearn React with a live code editor
 GSAP PlaygroundLearn GSAP animation interactively
 SVG Playground44 lessons · shapes · paths · animation
 SCSS Playground45 lessons · Sass modules · tokens
 Tailwind PlaygroundLearn Tailwind CSS with a live editor
 Bootstrap 5 Playground50 lessons · live preview
Product Image Magnify Lens — Free HTML CSS JS Amazon-Style Zoom Snippet
Product Image Magnify Lens · Misc · Plain HTML, CSS & JS · Live preview
What's included
Features
About this UI Snippet
Product Image Magnify Lens — HTML, CSS & JavaScript Hover Zoom
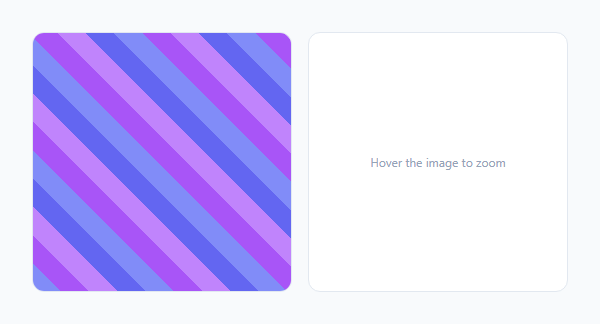
E-commerce product pages often need to show fine detail — fabric texture, stitching, screen resolution — that a normal-sized photo can't convey. The "magnify lens" pattern, popularized by Amazon, solves this by overlaying a small square lens on the image that follows the cursor, while a separate zoomed panel shows a magnified view of exactly the region under the lens.
How the lens follows the cursor
A mousemove listener on the image container calculates the cursor's position relative to the container using e.clientX - rect.left and e.clientY - rect.top (where rect is from getBoundingClientRect()). The lens is centered on the cursor by subtracting half its own size from that position. Math.max(0, Math.min(...)) clamps the lens position so it never slides past the edges of the image — without this clamp, dragging the cursor to the very edge would push the lens partially outside the image bounds, which looks broken and would reference invalid image coordinates.
How the zoomed panel shows the correct region
The zoom panel is a separate element with its own background-image set to the *same* image as the product photo, but scaled much larger via background-size (the container's width/height multiplied by a ZOOM_FACTOR), and then positioned with background-position set to the negative of the lens's coordinates, also multiplied by ZOOM_FACTOR. This is the same technique used by CSS sprite sheets: an oversized background image is shifted so only the desired region shows through the panel's fixed viewport size. Because the lens position and the background-position math both derive from the same x/y values (just scaled by the zoom factor), the zoomed view always shows precisely what's under the lens, not an approximation.
Why the zoom factor is a single constant
ZOOM_FACTOR controls both how much larger the background image is scaled and how much further the background-position shifts per pixel of lens movement — these two numbers must always match, or the zoomed image would drift out of alignment with the lens as the cursor moves. Keeping it as one shared constant guarantees they never get out of sync.
Extending to real photography
This demo uses a repeating CSS gradient as a stand-in "image" so the effect is visible without an external asset. In production, set background-image: url(...) on .product-image with a real, sufficiently high-resolution photo — the zoom quality is limited by the source image's native resolution, since the zoom panel is just scaling that same file larger.
Build with AI
Build, Understand, Optimize, and Extend It With AI
Ask an AI assistant to walk through the sprite-sheet-style math connecting the lens's clamped coordinates to the zoom panel's background-size and background-position values — understanding why both must be scaled by the same ZOOM_FACTOR is the key to correctly extending or debugging this pattern. It's also worth asking the assistant to add touch support (a tap-and-hold to activate the lens on mobile), or to swap the CSS background-image approach for a real <img>-based implementation if you need features like responsive srcset images.
Prompt to recreate it
Copy this into your AI assistant of choice to build the effect from scratch, or as a jumping-off point for your own variant:
Build a "product image magnify lens" (Amazon-style zoom) in plain HTML, CSS, and vanilla JavaScript — no canvas, no library.

Requirements:
- A product image panel and a separate adjacent zoom panel of the same visible size, both empty/hidden of zoom content until hovered.
- A small square "lens" overlay that appears on mouseenter over the image and follows the cursor on mousemove, calculated using getBoundingClientRect() so the lens position is relative to the image container regardless of page scroll.
- The lens position must be clamped so it can never move outside the bounds of the image, even when the cursor itself is at or beyond the image's edge.
- The zoom panel must share the same source image as a background-image, scaled up by a single named zoom-factor constant via background-size, and shifted using background-position calculated as the negative of the lens's current coordinates multiplied by that same zoom-factor — so the zoomed view always corresponds exactly to the region currently under the lens.
- On mouseleave, the lens must hide and the zoom panel must reset to an empty/placeholder state.
- Keep the zoom factor and lens size as two independently adjustable constants near the top of the JavaScript.
Want to tighten it up first? Run this prompt through the AI Prompt Studio to score it across 8 quality dimensions, catch anti-patterns, and tune the wording for Claude, ChatGPT, or Gemini before you paste it in.
Step by step
How to Use
- 1Load the snippetClick "Product Image Magnify Lens" in the sidebar Library tab to load the demo panels.
- 2Hover the imageMove your cursor over the left panel in the preview and watch the lens follow it and the right panel zoom in.
- 3Swap in a real photoReplace the .product-image background gradient with background-image: url(your-photo.jpg) at high resolution.
- 4Adjust the zoom levelChange the ZOOM_FACTOR constant in the JS panel — higher values zoom in further but require a higher-resolution source image.
- 5Adjust the lens sizeChange the lens width/height in the CSS panel to make the highlighted region larger or smaller.
- 6Export and saveExport as HTML/JSX/Tailwind or click "Save as" to reuse this on a real product detail page.
Real-world uses
Common Use Cases
Got questions?
Frequently Asked Questions
A mousemove listener uses getBoundingClientRect() on the image container to get its position on the page, then subtracts that from the cursor's clientX/clientY to get coordinates relative to the image itself, independent of scroll position or page layout.
The zoom panel shares the same background image as the product photo, scaled up by a zoom factor via background-size, and shifted into position with background-position set to the negative of the lens coordinates multiplied by that same zoom factor — the same technique used for CSS sprite sheets.
They aren't directly coupled by value, but ZOOM_FACTOR is used consistently for both scaling the background image and shifting its position, so the visible zoomed region always corresponds exactly to what the lens is currently covering. Changing ZOOM_FACTOR changes how much magnification is applied without breaking that alignment.
The lens position is clamped with Math.max/Math.min so it can never move past the image boundaries, keeping it fully within the visible photo at all times even when the cursor itself is right at the edge.
Yes — the zoom effect works by scaling up the same image file, so the maximum useful zoom level is limited by the source photo's native resolution. A low-resolution image will look blurry once magnified.
The demo uses a background-image because it makes the scale/position math for the zoom panel straightforward with plain CSS. Using an <img> tag would require the equivalent object-position and transform: scale math applied to the image element instead.
The base version relies on mouse hover events (mouseenter/mousemove/mouseleave), so it does not activate on touch. A touch-friendly version would need to listen for touchmove and possibly show the zoom panel in a modal or below the image instead of side by side.