More Loaders Snippets
Front-End Coding Playgrounds
Learn to code with interactive, live-preview playgrounds — HTML, CSS, JavaScript, React & more.
 HTML Playground42 lessons · Click-based · Live preview
 CSS PlaygroundLearn CSS with a live editor
 JavaScript Playground60 lessons · DOM · Async · Canvas
 React PlaygroundLearn React with a live code editor
 GSAP PlaygroundLearn GSAP animation interactively
 SVG Playground44 lessons · shapes · paths · animation
 SCSS Playground45 lessons · Sass modules · tokens
 Tailwind PlaygroundLearn Tailwind CSS with a live editor
 Bootstrap 5 Playground50 lessons · live preview
Image Blur-Up Loader — Progressive Image Snippet
Image Blur-Up Loader · Loaders · Plain HTML, CSS & JS · Live preview
What's included
Features
::after renders the same image blurred over the sharp original; fading it out on load produces the sharpen-into-focus crossfade.1.15 so filter: blur() does not feather transparent edges into the tile.::before sweeps a diagonal highlight on a loop while loading, the familiar "content coming" cue, then disables itself on load.loadImages adds .loaded on a per-tile staggered timer with jitter, mimicking real independent download completion.img.onload — swap one line to drive the reveal from real downloads.reload resets state and re-runs on the next animation frame, so the placeholder repaints before the effect replays.About this UI Snippet
Image Blur-Up Loader — LQIP Placeholder, Shimmer & Sharpen-On-Load Reveal
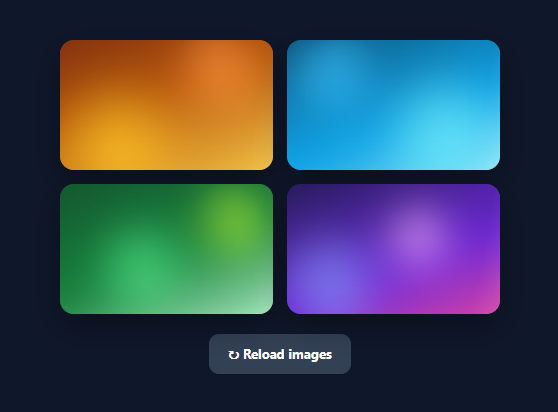
Blur-up is the progressive image-loading technique behind Medium, Next.js Image, and most modern media sites. Instead of a blank box or a sudden image pop-in, you show a tiny, blurred low-quality placeholder (an LQIP) immediately, then crossfade to the full-resolution image once it downloads — the picture appears to sharpen into focus. It eliminates layout shift, gives instant visual feedback, and feels premium. This snippet implements the full effect in plain HTML, CSS, and vanilla JavaScript: a blurred placeholder with an animated shimmer that sharpens into the final image, plus a staggered gallery reveal and a reload control to replay it.
The two-layer blur-up structure
Each card's image area renders the full image as its background, and a ::after pseudo-element renders the *same* image scaled up and heavily blurred (filter: blur(16px)) on top of it at full opacity. So before "load", you see only the soft, blurred version. When the card gains the .loaded class, the blurred ::after transitions its opacity to zero over 0.7s, revealing the crisp image underneath — the signature sharpen-into-focus crossfade. Scaling the blur layer slightly (scale(1.15)) hides the transparent edges that blur() would otherwise feather in.
Shimmer while loading
A ::before layer sweeps a diagonal highlight gradient across the placeholder on a loop (bu-shimmer), the same skeleton-loader cue users associate with "content is coming". It is disabled and faded out the moment the card loads, so the shimmer never competes with the real image. The caption also fades and slides up only after load, so text never appears over a blurry, unreadable placeholder.
Staggered, realistic reveal
loadImages adds .loaded to each card on a staggered, slightly randomised timer (500 + i × 450 + random), mimicking how real images finish downloading at different times rather than all at once. This is purely a stand-in for the real trigger: in production you set each <img>'s src (or data-src via an IntersectionObserver for lazy loading) and add .loaded in its onload handler. The CSS does not change.
Replayable
reload removes .loaded from every card to restore the blurred shimmer state, then calls loadImages on the next animation frame so the browser paints the placeholder before the reveal begins again — letting you see the effect repeatedly.
The placeholders here are built from layered CSS gradients so the snippet is self-contained, but the structure maps one-to-one onto real images: use a base64 LQIP (a tiny ~20px blurred thumbnail) as the blur layer and the full file as the image. Pair this with an infinite scroll feed, a skeleton loader for non-image content, or a photo gallery grid.
Build with AI
Build, Understand, Optimize, and Extend It With AI
You don't have to work out the crossfade layering by hand. Paste this snippet's HTML, CSS, and JS into an AI coding assistant like Claude and ask it to explain exactly why the blurred layer is scaled up with scale(1.15) before the blur filter is applied, or how swapping the simulated setTimeout for a real img.onload handler would change the loadImages function while leaving the CSS untouched. The same assistant is useful for optimizing it — ask whether the shimmer animation's background-position keyframe is GPU-accelerated or would benefit from being expressed as a transform instead for smoother performance on lower-end devices. It's just as handy for extending the loader: ask it to wire real lazy loading with an IntersectionObserver so offscreen tiles don't start downloading until they approach the viewport, generate real base64 LQIP placeholders at build time instead of gradient stand-ins, or add a subtle scale-down-to-scale-up motion during the sharpen transition. Treat the code less like a finished artifact and more like a starting point for a conversation.
Prompt to recreate it
Copy this into your AI assistant of choice to build the effect from scratch, or as a jumping-off point for your own variant:
Build a progressive "blur-up" image loading gallery in plain HTML, CSS, and JavaScript — no library, no framework image component.

Requirements:
- A grid of image cards, each containing a base sharp image layer and a second absolutely-positioned layer directly on top showing the identical image blurred with a CSS blur filter and scaled up slightly (to hide the blur filter's feathered edges from bleeding past the tile boundary).
- Each card must also show a diagonal shimmer highlight sweeping across it on a continuous CSS keyframe animation (looping background-position) while the card is in its unloaded state, to signal "content is loading" the way a skeleton loader does.
- Add a "loaded" state class per card that, when applied, fades the blurred overlay layer's opacity to zero over roughly 0.7 seconds (revealing the sharp image beneath) and simultaneously stops and hides the shimmer animation.
- Each card's caption must start hidden and only fade in and slide up after that card receives its loaded class, with a slight additional transition delay so the caption clearly follows the image sharpening rather than appearing simultaneously.
- Simulate real-world staggered image loading by adding the loaded class to each card after a different randomized delay (not all cards at the same instant), structured so that in production this exact trigger point could be replaced by a real image element's onload event with no other code changes.
- Add a reload control that removes the loaded class from every card, waits one animation frame for the blurred/shimmering state to repaint, and then re-triggers the staggered load sequence so the whole effect can be replayed on demand.
Step by step
How to Use
- 1Paste HTML, CSS, and JSA 2×2 gallery appears with each tile starting blurred and shimmering, then sharpening into a crisp image one after another.
- 2Watch the sharpen-inEach tile's blurred placeholder crossfades to the sharp image over about 0.7s, and its caption fades up once the image is clear.
- 3Note the staggerThe four tiles reveal at slightly different, randomised times — mimicking real images finishing their downloads independently.
- 4Replay itClick "↻ Reload images" — every tile returns to the blurred shimmer state and the blur-up sequence plays again.
- 5Swap in real imagesUse a tiny base64 LQIP as the blur layer and your full image as the background or
<img>; add.loadedin the image'sonload. - 6Add lazy loadingTrigger the load via an
IntersectionObserverso each image only starts downloading when it scrolls near the viewport.
Real-world uses
Common Use Cases
Got questions?
Frequently Asked Questions
Generate a tiny (~20px wide) blurred thumbnail for each image, base64-encode it, and use it as the ::after blur layer (or a separate <img>). Load the full image and add the .loaded class in its onload handler: img.onload = () => card.classList.add('loaded'). Set the full src last so the placeholder shows first. The CSS crossfade is identical.
At build time, resize each image to ~16–24px wide and base64-encode it (tools like sharp, lqip, or plaiceholder do this). The result is a sub-1KB string you inline as the blur layer's background — no extra network request, instant render. Frameworks like Next.js Image automate this with their placeholder="blur" prop.
Wrap each card in an IntersectionObserver. The blurred LQIP shows immediately (it is inline), but only set the full image's src when the card intersects the viewport, adding .loaded on its onload. This way off-screen images cost nothing until the user scrolls near them, while still avoiding pop-in.
No, as long as the image container has a fixed aspect ratio or height (this snippet sets a height). Because the placeholder occupies the final image's box from the first paint, the sharp image replaces it in place with no reflow — which is exactly why blur-up scores well on Cumulative Layout Shift.
In React, track a loaded boolean per image in state, render the blur layer and the <img>, and set loaded in onLoad; toggle the class from state. In Vue, use a ref and @load. In Angular, bind [class.loaded] and (load). Or simply use a framework image component (Next.js Image with placeholder="blur") which implements this technique natively. The two-layer CSS ports unchanged.