You Might Also Like
Learn Coding Visually
Learn to code with interactive, live-preview playgrounds — HTML, CSS, JavaScript, React & more.
 HTML Playground42 lessons · Click-based · Live preview
 CSS PlaygroundLearn CSS with a live editor
 JavaScript Playground60 lessons · DOM · Async · Canvas
 React PlaygroundLearn React with a live code editor
 GSAP PlaygroundLearn GSAP animation interactively
 SVG Playground44 lessons · shapes · paths · animation
 SCSS Playground45 lessons · Sass modules · tokens
 Tailwind PlaygroundLearn Tailwind CSS with a live editor
 Bootstrap 5 Playground50 lessons · live preview
GLB Exploded View Assembly Toggle — Free Three.js glTF Snippet
GLB Exploded View Assembly Toggle · Cards · Plain HTML, CSS & JS · Live preview
What's included
Features
About this UI Snippet
GLB Exploded View Assembly Toggle — Any glTF Hierarchy, Pulled Apart Automatically
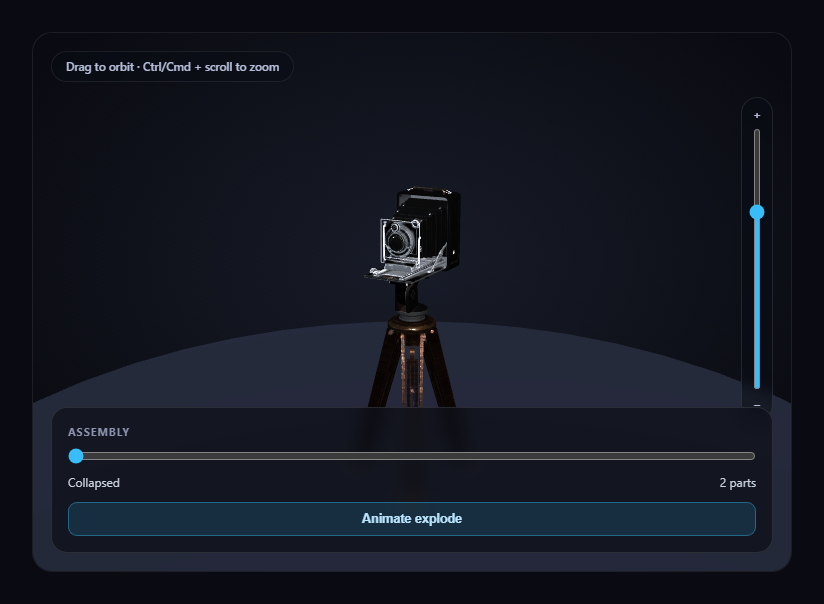
Exploded diagrams are everywhere in product manuals and assembly guides, but building one usually means hand-authoring an offset for every single part. This snippet does it generically instead: it loads a real .glb model, flattens every mesh node in its hierarchy into a flat list, and computes each part's own outward "explode direction" automatically from the assembly's bounding-box center — no part needs a hand-authored offset, and the same code works on any glTF file with more than one mesh.
Flattening the hierarchy, not assuming a specific structure
model.traverse() walks every node in the loaded scene graph at any depth and collects every isMesh node into a flat meshNodes array — regardless of how deeply the source .glb nests its parts inside groups. This is what makes the technique reusable: it makes no assumption about a specific model's node names or structure.
Direction from geometry, not authored by hand
For each mesh, its current world-space position is compared against the assembly's own overall bounding-box center (overallBox.getCenter()), and the normalized difference becomes that part's permanent direction vector — parts near the center barely move, parts near the edges of the assembly explode outward the furthest, exactly like a real technical exploded diagram, without a single manually-tuned number.
Recomputed from a stable baseline, never accumulated
Each part also keeps its originalPosition, captured once at load time. applyExplode(amount01) always sets p.node.position back to that original position plus direction * amount01 * MAX_OFFSET — never adds to whatever the position currently is. That means dragging the slider back and forth thousands of times, or restarting the auto-play animation mid-way, can never drift a part's position off from where it should be.
A slider, plus an optional idle animation
The explode amount is driven by a plain range input for direct manual control, and a separate "Animate explode" toggle drives the exact same applyExplode() function from a ping-ponging value inside the render loop — both paths converge on one function, so there's only ever one source of truth for where a part currently sits.
A real, honest fallback with its own parts
If the .glb fails to load, the fallback isn't a single placeholder mesh — it's a small three-piece placeholder group, each piece registered into the same parts array with its own computed direction, so the explode slider and animate button both keep working correctly even without the real model.
Zoom is opt-in, not a hijacked scroll wheel
OrbitControls' built-in wheel-zoom is turned off, with zoom reimplemented as a slider plus Ctrl/Cmd + scroll, so a plain scroll over the card always scrolls the page.
Customizing it
Swap MODEL_URL for any multi-part .glb, tune MAX_OFFSET for a bigger or smaller explosion, or pair this with GLB hotspot annotation viewer to label each part once it's pulled apart.
Build with AI
Build, Understand, Optimize, and Extend It With AI
Paste this snippet's HTML, CSS, and JS into an AI coding assistant like Claude and ask it to explain exactly why computing each part's explode direction from its position relative to the assembly's bounding-box center works correctly on any glTF model, without needing to know that model's specific part names or hierarchy ahead of time. It's also useful for extending the demo — ask it to stagger each part's explode animation timing so parts closer to the surface move first, add labeled callouts that fade in for each part once it's sufficiently exploded, or add a "reassemble" button that animates every part back to zero with an eased eco duration instead of a linear ping-pong. Use the conversation to build real intuition for generic scene-graph traversal before applying the same exploded-view technique to your own multi-part glTF model.
Prompt to recreate it
Copy this into your AI assistant of choice to build the effect from scratch, or as a jumping-off point for your own variant:
Build a "GLB exploded view assembly toggle" in plain HTML, CSS, and JavaScript using Three.js (core, GLTFLoader, and OrbitControls, all loaded from a CDN with no bundler).

Requirements:
- A full-size Three.js scene with OrbitControls (damping enabled, bounded min/max zoom distance) so a visitor can drag to orbit the camera around a loaded multi-part 3D model at any time, studio-lit with key and fill lights plus a simple grounding disc.
- Load a real .glb model using THREE.GLTFLoader pointed at a genuine, freely-licensed, CDN-hosted glTF binary URL that is made of multiple distinct mesh parts (e.g. one of Khronos' official glTF-Sample-Assets models) — do not substitute a single primitive geometry.
- After the model loads, measure its bounding box and scale it to a fixed target height rather than a hardcoded scale number, then reposition it so it rests on the ground plane.
- Traverse the entire loaded model's node hierarchy (at any nesting depth) to collect every mesh node into a flat list. For each mesh, compute its current world position, compare it against the bounding-box center of the entire assembly, and store the normalized difference as that part's own outward "explode direction" — do not hardcode explode directions for specific named parts, since the technique must work on any multi-part glTF model.
- Also capture each part's original local position at load time. Add a range-input slider from 0 to 100 whose input event recomputes every part's position as its original position plus its own direction vector scaled by the current slider value and a maximum offset distance — the position must always be recomputed from the original baseline, never incrementally accumulated, so scrubbing the slider back and forth never drifts a part out of place.
- Add a toggle button that starts an automatic ping-pong animation of the same explode amount between 0 and 100 inside the render loop, using the exact same position-setting function the manual slider uses.
- Turn off OrbitControls' own wheel-zoom and instead implement zoom as an explicit opt-in gesture: a vertical range-input slider next to the canvas, plus Ctrl/Cmd + scroll wheel — a plain scroll must do nothing and pass through to the page normally.
- Handle the GLTFLoader's error callback by logging the real error and substituting a small multi-piece placeholder group (not a single mesh), registering each placeholder piece into the same parts list so the explode slider and animate button keep working even if the real model fails to load.
Want to tighten it up first? Run this prompt through the AI Prompt Studio to score it across 8 quality dimensions, catch anti-patterns, and tune the wording for Claude, ChatGPT, or Gemini before you paste it in.
Step by step
How to Use
- 1Add all three CDN scriptsthree.min.js, GLTFLoader.js, and OrbitControls.js.
- 2Paste HTML, CSS, and JSThe camera model loads fully assembled, with its real part count shown.
- 3Drag the assembly sliderEvery part slides outward from the assembly's own center, proportionally.
- 4Click "Animate explode"The explosion ping-pongs automatically between collapsed and exploded.
- 5Drag on the canvasOrbit the camera freely at any explode amount.
- 6Use the slider or Ctrl/Cmd + scroll to zoomPlain scroll always scrolls the page; zoom is a separate, opt-in gesture.
- 7Swap the model URLPoint MODEL_URL at any multi-part .glb to explode a different assembly.
Real-world uses
Common Use Cases
Got questions?
Frequently Asked Questions
For every mesh node found by traversing the loaded model, the snippet compares that mesh's current world position against the bounding-box center of the entire assembly, and normalizes the difference into a direction vector. Parts near the assembly's center barely move outward; parts near its edges move the furthest — the same logic a real technical exploded diagram follows, computed automatically from geometry rather than authored by hand for a specific model.
Each part keeps its original local position captured once at load time. applyExplode() always sets a part's position to that original position plus its direction scaled by the current explode amount — never adds an increment to wherever the part currently sits. That means the slider, the animate-toggle, and repeated back-and-forth dragging can never accumulate drift; the same slider value always produces the exact same part positions.
Any model with more than one mesh node, at any nesting depth. model.traverse() walks the entire loaded hierarchy and collects every mesh it finds into a flat list, with no assumption about node names, groups, or how the source .glb organized its parts — the direction computation only needs each part's world position, which every mesh has regardless of authoring convention.
The loader's error callback logs the real failure and builds a small three-piece placeholder group instead, registering each piece into the same parts array the slider and animate button already read from — so the exploded-view interaction keeps working correctly even without the real model.
Set up the renderer, scene, GLTFLoader call, and OrbitControls inside a mount effect, keeping the parts array, assemblyCenter, and autoPlaying flag in refs so the slider input handler and the render loop can reach current values. Call controls.dispose() and renderer.dispose() in the cleanup function to release the WebGL context and drag listeners on unmount.