You Might Also Like
Learn Coding Visually
Learn to code with interactive, live-preview playgrounds — HTML, CSS, JavaScript, React & more.
 HTML Playground42 lessons · Click-based · Live preview
 CSS PlaygroundLearn CSS with a live editor
 JavaScript Playground60 lessons · DOM · Async · Canvas
 React PlaygroundLearn React with a live code editor
 GSAP PlaygroundLearn GSAP animation interactively
 SVG Playground44 lessons · shapes · paths · animation
 SCSS Playground45 lessons · Sass modules · tokens
 Tailwind PlaygroundLearn Tailwind CSS with a live editor
 Bootstrap 5 Playground50 lessons · live preview
Canvas Audio Frequency Bars — Free Web Audio API Visualizer
Canvas Audio Frequency Bars · Animations · Plain HTML, CSS & JS · Live preview
What's included
Features
About this UI Snippet
Canvas Audio Frequency Bars — Real Mic Input With a Graceful Fallback
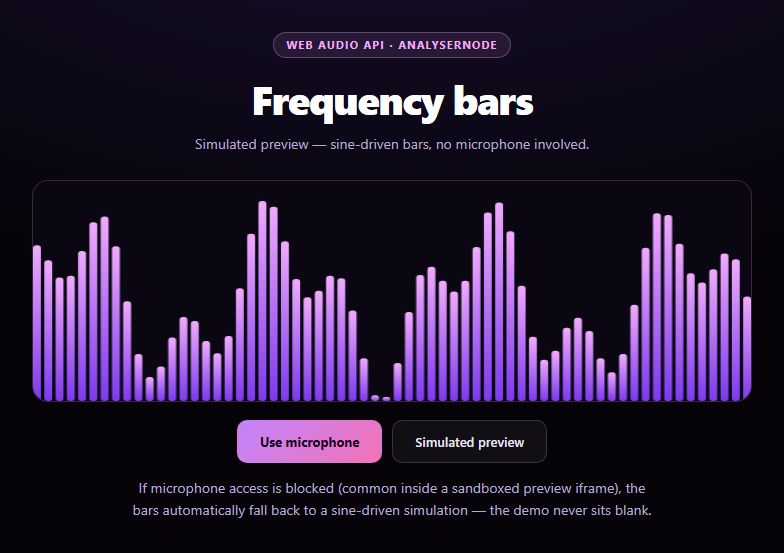
This snippet is a real audio-reactive visualizer, not a faked one: click "Use microphone" and it asks for getUserMedia, routes the live stream through a Web Audio AnalyserNode, and paints genuine frequency-bin data to canvas every frame. What makes it worth studying isn't just the Web Audio wiring — it's the fallback path that keeps the demo looking intentional no matter what the browser or embedding context allows.
The real path: getUserMedia to AnalyserNode
navigator.mediaDevices.getUserMedia({ audio: true }) requests the microphone and resolves with a MediaStream. That stream is wrapped in audioCtx.createMediaStreamSource(micStream) and piped into an AnalyserNode with fftSize: 256, which exposes 128 frequency bins. Every animation frame, analyser.getByteFrequencyData(freqData) fills a Uint8Array with the current 0-255 magnitude of each bin — that array, sliced down to BAR_COUNT, is what actually drives every bar's height. smoothingTimeConstant: 0.82 is the analyser's own built-in smoothing, so bars ease between frames instead of jittering on every sample.
Why a fallback is not optional here
Microphone access is one of the few browser APIs that can fail in ways entirely outside your code's control: the user can deny the permission prompt, the browser can lack support, or — very commonly for a snippet rendered inside a sandboxed preview <iframe> — the surrounding page's Permissions-Policy can simply never grant microphone to that frame, so getUserMedia rejects immediately with no prompt shown at all. A visualizer that goes blank in that case looks broken, not permission-restricted.
A simulation indistinguishable from motion
simulatedFrame() blends two sine waves per bar — a slow base term and a faster wobble term — multiplied by a slow-moving envelope that swells and recedes like a breathing loudness curve, then packs the result into the exact same Uint8Array shape getByteFrequencyData would produce. Because drawBars() only ever consumes that shape, the rendering code has no idea whether its data came from a real microphone or from math — which is exactly the point: the fallback isn't a "no audio" message, it's a full visual substitute.
Fail-into-simulation, always
startMic() wraps the entire request in a try/catch; any rejection — NotAllowedError from a denied prompt, NotFoundError with no microphone present, or a security error from a Permissions-Policy block — routes to startSimulated() with a message naming the error. The loop itself never branches on whether the *attempt* succeeded, only on the current mode, so there's exactly one code path that decides what's on screen at any moment. Pair this with an audio waveform visualizer for a player UI, or a particle network background reacting to the same analyser data.
Build with AI
Build, Understand, Optimize, and Extend It With AI
Paste this snippet's HTML, CSS, and JS into an AI coding assistant like Claude and ask it to explain how audio flows from getUserMedia's MediaStream through createMediaStreamSource into an AnalyserNode, and why getByteFrequencyData needs a Uint8Array sized to analyser.frequencyBinCount rather than an arbitrary length. It's especially useful for reasoning about the fallback design — ask why the simulated data is built to match the exact shape and value range of real frequency data instead of just rendering a "no microphone" message, and why the try/catch around getUserMedia routes every kind of failure (denied permission, missing device, blocked iframe permissions policy) into the same simulated state rather than showing different UI for each. For extensions, ask it to add a second AnalyserNode fed by getByteTimeDomainData for a companion waveform view, expose fftSize and smoothingTimeConstant as live sliders, or add a peak-hold line above each bar that decays slowly. It can also help you reason about the iframe permissions angle — ask how a host page would need to configure an iframe's allow attribute for microphone access to work at all. Treat the code less like a finished artifact and more like a starting point for a conversation.
Prompt to recreate it
Copy this into your AI assistant of choice to build the effect from scratch, or as a jumping-off point for your own variant:
Build a "canvas audio frequency bars" visualizer in plain HTML, CSS, and JavaScript using the real Web Audio API and Canvas 2D — no libraries.

Requirements:
- A canvas that renders a fixed number of gradient-filled bars (e.g. 64) across its width, each bar's height driven by a Uint8Array of 0-255 magnitude values, redrawn every requestAnimationFrame tick.
- A "Use microphone" button that calls navigator.mediaDevices.getUserMedia({ audio: true }), and on success routes the resulting MediaStream through audioCtx.createMediaStreamSource into an AnalyserNode (fftSize 256, a smoothingTimeConstant around 0.8) so that analyser.getByteFrequencyData(...) supplies real per-frame frequency-bin data to the bar renderer.
- CRITICAL: implement a graceful fallback. Wrap the entire getUserMedia and Web Audio setup in a try/catch (and also check that navigator.mediaDevices.getUserMedia exists before calling it). On ANY failure — permission denied, no device found, unsupported browser, or a blocked Permissions-Policy in a sandboxed iframe (a common and expected scenario since this snippet may render inside a sandboxed preview iframe with no microphone permission granted to it) — fall back to a "simulated" mode that generates fake but visually convincing frequency data every frame using a blend of a couple of sine waves per bar plus a slow modulating envelope, packed into a Uint8Array of the identical shape and 0-255 range that real frequency data would have, so the exact same drawing function renders both modes with no special-casing.
- Show a status text element that clearly communicates the current state (idle/simulated, requesting access, live microphone active, or a specific error name if the request failed) so the user understands why they might be seeing simulated bars instead of real audio.
- Start the demo in simulated mode immediately on page load (so it is never blank), provide a button to manually switch back to simulated mode at any time, and stop all MediaStream tracks both when switching away from microphone mode and on page unload so the microphone indicator in the browser tab turns off correctly.
Want to tighten it up first? Run this prompt through the AI Prompt Studio to score it across 8 quality dimensions, catch anti-patterns, and tune the wording for Claude, ChatGPT, or Gemini before you paste it in.
Step by step
How to Use
- 1Paste HTML, CSS, and JSA simulated bar pattern animates immediately on load.
- 2Click "Use microphone"The browser prompts for mic access; allow it to see real audio.
- 3Talk or play musicBars react to genuine frequency-bin data from AnalyserNode.
- 4Deny or block accessThe status message explains why, and bars fall back to simulation.
- 5Click "Simulated preview"Switch back to the sine-driven pattern at any time.
- 6Tune the visualizerChange fftSize, smoothingTimeConstant, or BAR_COUNT.
Real-world uses
Common Use Cases
Got questions?
Frequently Asked Questions
Microphone access can fail for reasons entirely outside the page's control: the user denies the browser prompt, no microphone device exists, or — especially common when this snippet is rendered inside a sandboxed preview iframe — the surrounding page's Permissions-Policy never grants the microphone feature to that frame, so getUserMedia rejects immediately without even showing a prompt. Rather than leave the canvas blank in any of those cases, the code catches the rejection and switches to a sine-driven simulated pattern.
It will always show something — either real mic data if the iframe is allowed the microphone permission and the user grants it, or the simulated fallback if not. Many sandboxed preview environments (including embedded code sandboxes) block microphone access by default via their iframe's allow attribute or Permissions-Policy header, which is exactly the scenario startMic()'s catch block is designed for: it fails quietly into a visually complete simulation instead of an error state.
simulatedFrame() blends a slow sine wave and a faster one per bar, modulated by a slowly breathing envelope term, and packs the result into a Uint8Array with the exact same shape (length and 0-255 value range) that analyser.getByteFrequencyData would produce. Because the drawing function only ever reads that shape, it cannot tell whether the values came from a microphone or from math, so the two modes render with identical code.
fftSize (set to 256) determines frequency resolution — the AnalyserNode exposes fftSize / 2 frequency bins, so 256 gives 128 bins, of which the first 64 are drawn as bars here. smoothingTimeConstant (0.82) is the analyser's own exponential smoothing between consecutive samples; higher values make bars ease more gently between frames, lower values make them jump more sharply with each sample.
Move the AudioContext, AnalyserNode, and MediaStream setup into a mount effect, keep them in refs so they persist across renders, and start the requestAnimationFrame loop there. In cleanup, stop every track on the MediaStream and cancelAnimationFrame the loop so a component unmount doesn't leave the microphone active or the audio graph running in the background.