
Learn Coding Visually
Learn to code with interactive, live-preview playgrounds — HTML, CSS, JavaScript, React & more.
 HTML Playground42 lessons · Click-based · Live preview
 CSS PlaygroundLearn CSS with a live editor
 JavaScript Playground60 lessons · DOM · Async · Canvas
 React PlaygroundLearn React with a live code editor
 GSAP PlaygroundLearn GSAP animation interactively
 SVG Playground44 lessons · shapes · paths · animation
 SCSS Playground45 lessons · Sass modules · tokens
 Tailwind PlaygroundLearn Tailwind CSS with a live editor
 Bootstrap 5 Playground50 lessons · live preview
AI Chat Interface HTML CSS JS — ChatGPT-Style UI
AI Chat Interface · Layouts · Plain HTML, CSS & JS · Live preview
What's included
Features
About this UI Snippet
AI Chat Interface — How to Build a ChatGPT-Style Chat UI in HTML, CSS, and JavaScript
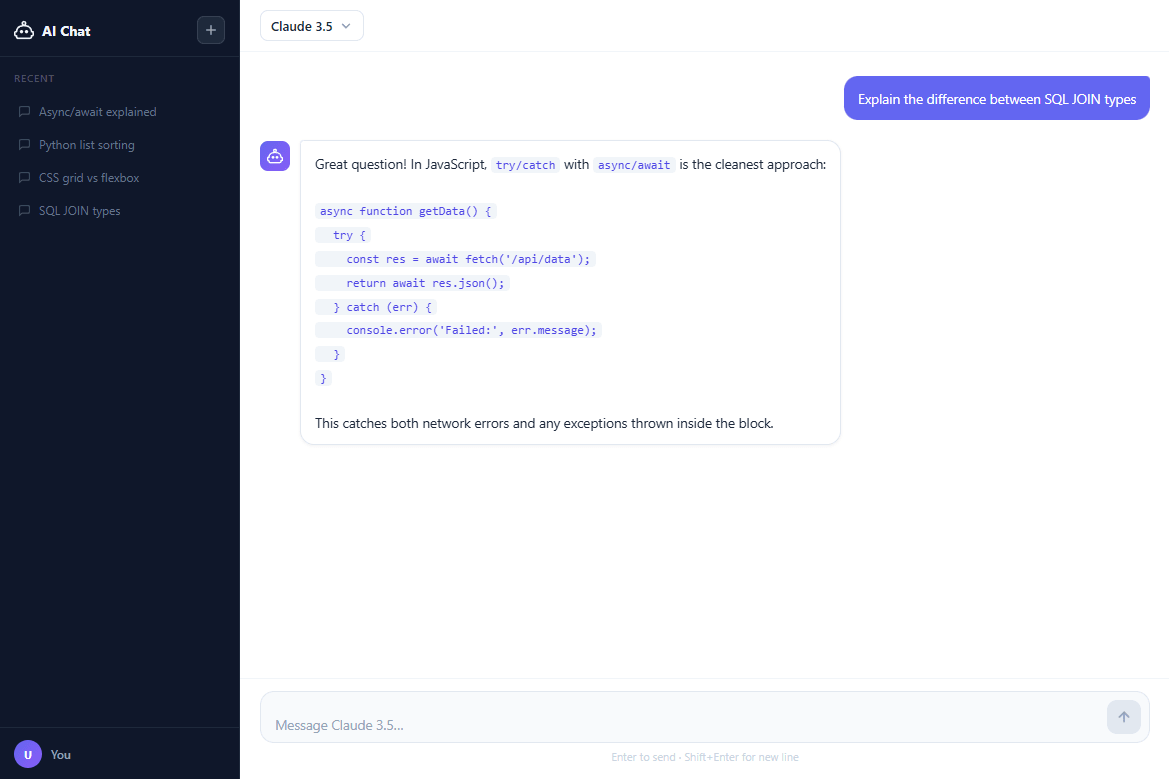
Conversational AI interfaces have a distinctive layout that users now recognize immediately: a sidebar listing past conversations, a central message thread with alternating user and assistant bubbles, a fixed bottom input bar with an auto-resizing textarea, and suggestion chips for quick prompts. Building this pattern correctly requires careful attention to scrolling behavior, textarea height management, streaming text effects, and message bubble rendering.
This snippet builds a complete, production-quality AI chat interface in plain HTML, CSS, and vanilla JavaScript — no React, no framework, no external library. Every interaction detail matches the pattern users expect from ChatGPT, Claude, and Gemini.
Auto-Resize Textarea
The input field is a <textarea> rather than an <input type="text"> to support multi-line messages. Auto-resizing is a two-step CSS+JS technique: set height: auto to collapse the textarea to its natural height, then immediately set height: scrollHeight + 'px' to expand it to fit all content. A max-height CSS property caps the growth and enables internal scrolling for very long messages.
The resize handler fires on every input event. Setting height: auto first is the critical step — without it, the element only grows (never shrinks) because scrollHeight reads the content height including any existing expansion.
Message Bubble Architecture
Each message is a <div class="message user"> or <div class="message assistant"> containing a <div class="bubble">. User bubbles align right with an accent background. Assistant bubbles align left with a surface background, a bot icon, and inline-formatted content supporting <code>, <strong>, and <br> tags from the canned response strings.
The appendMessage(role, html) function creates this structure programmatically, appends it to the messages container, and calls scrollToBottom() — which sets messages.scrollTop = messages.scrollHeight. The scrollToBottom() call is wrapped in requestAnimationFrame to ensure the DOM has updated before the scroll happens.
Streaming Text Animation
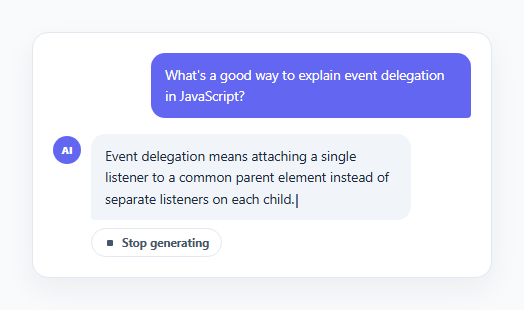
When the assistant responds, the text is revealed character by character using setInterval. The interval fires every 18ms, appending one character to the bubble's innerHTML. The streaming creates the illusion of the AI typing in real time — the same technique used in actual AI streaming implementations, though here the full response string is known in advance.
The streaming function: creates an empty bubble, starts an interval, reads one character from the response string on each tick, appends it to the bubble, calls scrollToBottom(), and clears the interval when the full string is appended. The send button is disabled during streaming and re-enabled when complete.
Conversation Sidebar
The left sidebar lists previous conversation items using <a class="conv-item"> elements. Clicking any item sets it as active (by removing active from all items and adding it to the clicked one). In a production implementation, each item would load its message history into the main thread — the snippet keeps the click handler hookable for this extension.
The sidebar has a collapsible state toggled by a hamburger-style button. On mobile (max-width: 640px) the sidebar overlays the chat area using position: fixed and a semi-transparent backdrop. The toggleSidebar() function adds/removes the .open class which drives the transform and visibility transitions via CSS.
Suggestion Chips
On initial load (empty state), the interface shows a set of suggestion chips — common starter prompts like "Explain async/await in JavaScript" or "Write a Python function to sort a list". Clicking a chip fills the textarea with that prompt and removes the chip area. Once the first message is sent, the chip area is hidden permanently in the session. This pattern reduces friction for new users who don't know what to type.
New Chat and Conversation History
The New Chat button (+ icon in the sidebar header) calls newChat() — clears the message thread, restores the suggestion chips, resets the input, focuses the textarea, and creates a new conversation entry in the sidebar list. The conversation entry uses the first message text (truncated to 30 characters) as its label, simulating the pattern of AI apps naming conversations after their first query.
Input Bar Layout
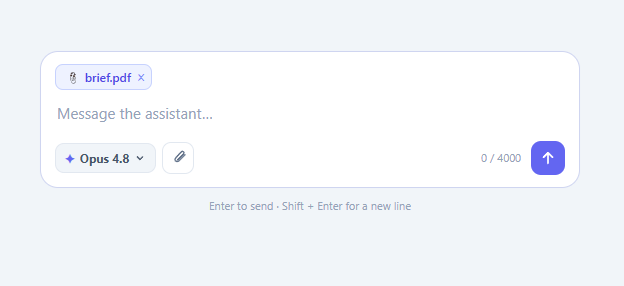
The input bar uses a display: flex row with the textarea taking flex: 1 and the send button fixed-width. The Enter key submits (via keydown event checking e.key === 'Enter' && !e.shiftKey), while Shift+Enter inserts a newline — the same keyboard behavior as ChatGPT and Claude's web interface. e.preventDefault() on plain Enter prevents the default form newline.
Styling the Code Blocks
The assistant responses include HTML with inline <code> tags. The CSS .bubble code styles these with a monospace font, a subtle background tint, and rounded corners — matching the pattern of AI chat interfaces that render markdown-style code inline without a full syntax highlighter.
Build with AI
Build, Understand, Optimize, and Extend It With AI
You don't have to trace the auto-grow and scroll logic by hand — paste this snippet's HTML, CSS, and JS into an AI coding assistant like Claude and ask it to explain exactly why the textarea's height is reset to auto before reading scrollHeight on every input event, and what would break if that reset were skipped. The same assistant is useful for optimizing it — asking whether appendMessage's approach of building a fresh DOM subtree per message is fast enough for a conversation with hundreds of messages, or whether older messages should be virtualized out of the DOM. It's just as good for extending the interface: ask it to replace the setTimeout-based canned responses with a real streaming fetch call to an LLM API using ReadableStream, add markdown/code-block rendering to assistant bubbles, or persist conversations to localStorage so they survive a page reload. Treat the code less like a finished artifact and more like a starting point for a conversation.
Prompt to recreate it
Copy this into your AI assistant of choice to build the effect from scratch, or as a jumping-off point for your own variant:
Build a ChatGPT-style "AI chat interface" in plain HTML, CSS, and JavaScript — no framework, no libraries, using a sidebar plus main chat panel layout.

Requirements:
- A fixed-width dark sidebar containing a "new chat" button, a list of clickable past-conversation entries (one marked active at a time), and a user row at the bottom; a flexible main panel containing a header with a clickable model-name selector, a scrollable message thread, an empty-state row of clickable suggestion chips, and a bottom input bar.
- The message input must be a textarea (not a single-line input) that automatically grows taller as the user types: on every input event, first reset its height to auto, then set it to its scrollHeight in pixels, capped at a maximum height beyond which it scrolls internally instead of growing further.
- Enter must send the message and Shift+Enter must insert a newline: implement this by checking e.key and e.shiftKey in a keydown handler and calling preventDefault only for the plain-Enter case.
- Sending a message must: append a right-aligned user bubble, clear and shrink the input, disable the send button, show a left-aligned "typing" indicator (three bouncing dots with staggered animation-delay values) in place of the assistant's response, and after a delay remove the typing indicator and append the assistant's reply bubble (built from a small rotating array of canned HTML responses for this demo, structured so a real API call could replace it later).
- Every new message appended to the thread must trigger the message container to scroll to its bottom automatically.
- Clicking a suggestion chip should fill the input with that chip's preset prompt text and focus the input, without sending it automatically. Clicking "new chat" should clear the thread, restore the suggestion chips, and reset the input.
Want to tighten it up first? Run this prompt through the AI Prompt Studio to score it across 8 quality dimensions, catch anti-patterns, and tune the wording for Claude, ChatGPT, or Gemini before you paste it in.
Source Code
<div class="app">
<!-- Sidebar -->
<aside class="sidebar" id="sidebar">
<div class="sidebar-header">
<div class="brand">
<svg width="20" height="20" viewBox="0 0 24 24" fill="none" stroke="currentColor" stroke-width="2" stroke-linecap="round" stroke-linejoin="round"><path d="M12 2a2 2 0 0 1 2 2c0 .74-.4 1.39-1 1.73V7h1a7 7 0 0 1 7 7h1a1 1 0 0 1 1 1v3a1 1 0 0 1-1 1h-1v1a2 2 0 0 1-2 2H5a2 2 0 0 1-2-2v-1H2a1 1 0 0 1-1-1v-3a1 1 0 0 1 1-1h1a7 7 0 0 1 7-7h1V5.73A2 2 0 0 1 10 4a2 2 0 0 1 2-2z"/><circle cx="9" cy="14" r="1" fill="currentColor"/><circle cx="15" cy="14" r="1" fill="currentColor"/></svg>
<span>AI Chat</span>
</div>
<button class="new-chat-btn" id="new-chat-btn" title="New chat">
<svg width="14" height="14" viewBox="0 0 24 24" fill="none" stroke="currentColor" stroke-width="2.5" stroke-linecap="round"><line x1="12" y1="5" x2="12" y2="19"/><line x1="5" y1="12" x2="19" y2="12"/></svg>
</button>
</div>
<div class="sidebar-section-label">Recent</div>
<nav class="conv-list" id="conv-list">
<button class="conv-item active" data-conv="0">
<svg width="13" height="13" viewBox="0 0 24 24" fill="none" stroke="currentColor" stroke-width="2" stroke-linecap="round"><path d="M21 15a2 2 0 0 1-2 2H7l-4 4V5a2 2 0 0 1 2-2h14a2 2 0 0 1 2 2z"/></svg>
<span>Async/await explained</span>
</button>
<button class="conv-item" data-conv="1">
<svg width="13" height="13" viewBox="0 0 24 24" fill="none" stroke="currentColor" stroke-width="2" stroke-linecap="round"><path d="M21 15a2 2 0 0 1-2 2H7l-4 4V5a2 2 0 0 1 2-2h14a2 2 0 0 1 2 2z"/></svg>
<span>Python list sorting</span>
</button>
<button class="conv-item" data-conv="2">
<svg width="13" height="13" viewBox="0 0 24 24" fill="none" stroke="currentColor" stroke-width="2" stroke-linecap="round"><path d="M21 15a2 2 0 0 1-2 2H7l-4 4V5a2 2 0 0 1 2-2h14a2 2 0 0 1 2 2z"/></svg>
<span>CSS grid vs flexbox</span>
</button>
<button class="conv-item" data-conv="3">
<svg width="13" height="13" viewBox="0 0 24 24" fill="none" stroke="currentColor" stroke-width="2" stroke-linecap="round"><path d="M21 15a2 2 0 0 1-2 2H7l-4 4V5a2 2 0 0 1 2-2h14a2 2 0 0 1 2 2z"/></svg>
<span>SQL JOIN types</span>
</button>
</nav>
<div class="sidebar-footer">
<div class="user-row">
<div class="user-avatar">U</div>
<span class="user-name">You</span>
</div>
</div>
</aside>
<!-- Main chat area -->
<div class="main">
<!-- Header -->
<header class="chat-header">
<div class="model-selector" id="model-selector">
<span class="model-name">Claude 3.5</span>
<svg width="14" height="14" viewBox="0 0 24 24" fill="none" stroke="currentColor" stroke-width="2.5" stroke-linecap="round"><polyline points="6 9 12 15 18 9"/></svg>
</div>
</header>
<!-- Messages -->
<div class="messages" id="messages">
<!-- Assistant message -->
<div class="msg-row assistant">
<div class="assistant-avatar">
<svg width="16" height="16" viewBox="0 0 24 24" fill="none" stroke="currentColor" stroke-width="2" stroke-linecap="round" stroke-linejoin="round"><path d="M12 2a2 2 0 0 1 2 2c0 .74-.4 1.39-1 1.73V7h1a7 7 0 0 1 7 7h1a1 1 0 0 1 1 1v3a1 1 0 0 1-1 1h-1v1a2 2 0 0 1-2 2H5a2 2 0 0 1-2-2v-1H2a1 1 0 0 1-1-1v-3a1 1 0 0 1 1-1h1a7 7 0 0 1 7-7h1V5.73A2 2 0 0 1 10 4a2 2 0 0 1 2-2z"/><circle cx="9" cy="14" r="1" fill="currentColor"/><circle cx="15" cy="14" r="1" fill="currentColor"/></svg>
</div>
<div class="bubble assistant-bubble">
Hi! I'm here to help with coding questions. What would you like to explore today?
</div>
</div>
<!-- User message -->
<div class="msg-row user">
<div class="bubble user-bubble">
Can you explain how async/await works in JavaScript?
</div>
</div>
<!-- Assistant message -->
<div class="msg-row assistant">
<div class="assistant-avatar">
<svg width="16" height="16" viewBox="0 0 24 24" fill="none" stroke="currentColor" stroke-width="2" stroke-linecap="round" stroke-linejoin="round"><path d="M12 2a2 2 0 0 1 2 2c0 .74-.4 1.39-1 1.73V7h1a7 7 0 0 1 7 7h1a1 1 0 0 1 1 1v3a1 1 0 0 1-1 1h-1v1a2 2 0 0 1-2 2H5a2 2 0 0 1-2-2v-1H2a1 1 0 0 1-1-1v-3a1 1 0 0 1 1-1h1a7 7 0 0 1 7-7h1V5.73A2 2 0 0 1 10 4a2 2 0 0 1 2-2z"/><circle cx="9" cy="14" r="1" fill="currentColor"/><circle cx="15" cy="14" r="1" fill="currentColor"/></svg>
</div>
<div class="bubble assistant-bubble">
<strong>async/await</strong> is syntactic sugar over Promises that makes asynchronous code read like synchronous code.<br><br>
An <code>async</code> function always returns a Promise. Inside it, <code>await</code> pauses execution until the awaited Promise resolves — but doesn't block the main thread.<br><br>
<strong>Example:</strong><br>
<code>async function fetchUser(id) {</code><br>
<code> const res = await fetch(`/api/users/${id}`);</code><br>
<code> return res.json();</code><br>
<code>}</code><br><br>
The key benefit: error handling with <code>try/catch</code> instead of chained <code>.catch()</code> callbacks.
</div>
</div>
<!-- User message -->
<div class="msg-row user">
<div class="bubble user-bubble">
That's really clear, thanks! What about error handling with async/await?
</div>
</div>
</div>
<!-- Suggested prompts (shown when chat is empty) -->
<div class="suggestions" id="suggestions" style="display:none">
<p class="suggestions-label">Try asking about</p>
<div class="suggestion-chips" id="suggestion-chips">
<button class="chip" data-prompt="Explain async/await in JavaScript">Explain async/await in JavaScript</button>
<button class="chip" data-prompt="Write a Python function to sort a list by key">Write a Python function to sort a list</button>
<button class="chip" data-prompt="What is the difference between CSS Grid and Flexbox?">CSS Grid vs Flexbox</button>
<button class="chip" data-prompt="Explain the difference between SQL JOIN types">Explain SQL JOIN types</button>
</div>
</div>
<!-- Input area -->
<div class="input-area">
<div class="input-box">
<textarea
id="chat-input"
class="chat-textarea"
placeholder="Message Claude 3.5…"
rows="1"
></textarea>
<button class="send-btn" id="send-btn" title="Send message" disabled>
<svg width="16" height="16" viewBox="0 0 24 24" fill="none" stroke="currentColor" stroke-width="2.5" stroke-linecap="round" stroke-linejoin="round"><line x1="12" y1="19" x2="12" y2="5"/><polyline points="5 12 12 5 19 12"/></svg>
</button>
</div>
<p class="input-hint">Enter to send · Shift+Enter for new line</p>
</div>
</div>
</div>* { box-sizing: border-box; margin: 0; padding: 0; }
body { font-family: system-ui, -apple-system, sans-serif; background: #f8fafc; height: 100vh; overflow: hidden; }
/* ─ App shell ─ */
.app { display: flex; height: 100vh; }
/* ─ Sidebar ─ */
.sidebar {
width: 240px; flex-shrink: 0;
background: #0f172a;
display: flex; flex-direction: column;
border-right: 1px solid #1e293b;
overflow: hidden;
}
.sidebar-header {
display: flex; align-items: center; justify-content: space-between;
padding: 16px 14px 12px;
border-bottom: 1px solid #1e293b;
flex-shrink: 0;
}
.brand {
display: flex; align-items: center; gap: 8px;
color: #f1f5f9; font-size: 14px; font-weight: 700;
}
.new-chat-btn {
width: 28px; height: 28px; border-radius: 7px;
background: #1e293b; border: 1px solid #334155;
color: #94a3b8; cursor: pointer;
display: flex; align-items: center; justify-content: center;
transition: background 0.15s, color 0.15s;
}
.new-chat-btn:hover { background: #334155; color: #f1f5f9; }
.sidebar-section-label {
font-size: 10px; font-weight: 600; color: #475569;
text-transform: uppercase; letter-spacing: 0.08em;
padding: 14px 14px 6px;
flex-shrink: 0;
}
.conv-list {
flex: 1; overflow-y: auto; padding: 4px 8px;
display: flex; flex-direction: column; gap: 1px;
}
.conv-list::-webkit-scrollbar { width: 4px; }
.conv-list::-webkit-scrollbar-track { background: transparent; }
.conv-list::-webkit-scrollbar-thumb { background: #334155; border-radius: 4px; }
.conv-item {
display: flex; align-items: center; gap: 8px;
padding: 8px 10px; border-radius: 8px;
background: none; border: none;
color: #64748b; font-size: 12px; font-family: inherit;
cursor: pointer; text-align: left; width: 100%;
transition: background 0.12s, color 0.12s;
white-space: nowrap; overflow: hidden;
}
.conv-item span { overflow: hidden; text-overflow: ellipsis; }
.conv-item:hover { background: #1e293b; color: #cbd5e1; }
.conv-item.active { background: #1e293b; color: #f1f5f9; font-weight: 500; }
.conv-item svg { flex-shrink: 0; opacity: 0.6; }
.sidebar-footer {
flex-shrink: 0; padding: 12px 14px;
border-top: 1px solid #1e293b;
}
.user-row { display: flex; align-items: center; gap: 9px; }
.user-avatar {
width: 28px; height: 28px; border-radius: 50%;
background: linear-gradient(135deg, #6366f1, #8b5cf6);
color: #fff; font-size: 11px; font-weight: 700;
display: flex; align-items: center; justify-content: center;
flex-shrink: 0;
}
.user-name { font-size: 12px; color: #94a3b8; font-weight: 500; }
/* ─ Main area ─ */
.main { flex: 1; display: flex; flex-direction: column; min-width: 0; background: #fff; }
/* ─ Header ─ */
.chat-header {
display: flex; align-items: center;
padding: 0 20px; height: 52px;
border-bottom: 1px solid #f1f5f9;
flex-shrink: 0;
}
.model-selector {
display: flex; align-items: center; gap: 6px;
padding: 6px 10px; border-radius: 8px;
cursor: pointer; border: 1px solid #e2e8f0;
transition: background 0.12s;
}
.model-selector:hover { background: #f8fafc; }
.model-name { font-size: 13px; font-weight: 600; color: #1e293b; }
.model-selector svg { color: #94a3b8; }
/* ─ Messages ─ */
.messages {
flex: 1; overflow-y: auto; padding: 24px 20px 16px;
display: flex; flex-direction: column; gap: 20px;
scroll-behavior: smooth;
}
.messages::-webkit-scrollbar { width: 5px; }
.messages::-webkit-scrollbar-track { background: transparent; }
.messages::-webkit-scrollbar-thumb { background: #e2e8f0; border-radius: 4px; }
.msg-row {
display: flex; gap: 10px; align-items: flex-start;
animation: fadeUp 0.2s ease both;
}
@keyframes fadeUp {
from { opacity: 0; transform: translateY(8px); }
to { opacity: 1; transform: translateY(0); }
}
.msg-row.user { flex-direction: row-reverse; }
.assistant-avatar {
width: 30px; height: 30px; border-radius: 8px;
background: linear-gradient(135deg, #6366f1 0%, #8b5cf6 100%);
color: #fff;
display: flex; align-items: center; justify-content: center;
flex-shrink: 0; margin-top: 1px;
}
.bubble { padding: 11px 14px; border-radius: 14px; font-size: 13.5px; line-height: 1.65; max-width: 72%; }
.assistant-bubble {
background: #fff; color: #1e293b;
border: 1px solid #e2e8f0;
border-radius: 4px 14px 14px 14px;
box-shadow: 0 1px 4px rgba(0,0,0,0.05);
}
.assistant-bubble code {
background: #f1f5f9; color: #4f46e5;
padding: 1px 5px; border-radius: 4px;
font-size: 12px; font-family: ui-monospace, 'Fira Code', monospace;
}
.assistant-bubble strong { color: #0f172a; }
.user-bubble {
background: #6366f1; color: #fff;
border-radius: 14px 4px 14px 14px;
}
/* ─ Typing indicator ─ */
.typing-indicator {
display: flex; gap: 4px; align-items: center;
padding: 12px 14px;
background: #fff; border: 1px solid #e2e8f0;
border-radius: 4px 14px 14px 14px;
width: fit-content;
}
.typing-indicator .dot {
width: 7px; height: 7px; border-radius: 50%;
background: #94a3b8;
animation: bounce 1.2s ease-in-out infinite;
}
.typing-indicator .dot:nth-child(2) { animation-delay: 0.2s; }
.typing-indicator .dot:nth-child(3) { animation-delay: 0.4s; }
@keyframes bounce {
0%, 60%, 100% { transform: translateY(0); }
30% { transform: translateY(-6px); }
}
/* ─ Suggestions ─ */
.suggestions {
padding: 0 20px 8px;
display: flex; flex-direction: column; gap: 10px;
flex-shrink: 0;
}
.suggestions-label { font-size: 12px; color: #94a3b8; font-weight: 500; }
.suggestion-chips { display: flex; flex-wrap: wrap; gap: 8px; }
.chip {
padding: 7px 13px; border-radius: 20px;
border: 1px solid #e2e8f0; background: #f8fafc;
color: #475569; font-size: 12px; font-family: inherit;
cursor: pointer; transition: border-color 0.12s, background 0.12s, color 0.12s;
}
.chip:hover { border-color: #6366f1; background: #eef2ff; color: #4f46e5; }
/* ─ Input area ─ */
.input-area {
flex-shrink: 0; padding: 12px 20px 16px;
border-top: 1px solid #f1f5f9;
display: flex; flex-direction: column; gap: 6px;
}
.input-box {
display: flex; align-items: flex-end; gap: 8px;
background: #f8fafc; border: 1.5px solid #e2e8f0;
border-radius: 14px; padding: 8px 8px 8px 14px;
transition: border-color 0.15s;
}
.input-box:focus-within { border-color: #6366f1; background: #fff; }
.chat-textarea {
flex: 1; resize: none; border: none; outline: none;
background: transparent; font-family: inherit;
font-size: 13.5px; line-height: 1.5; color: #1e293b;
max-height: 160px; overflow-y: auto;
}
.chat-textarea::placeholder { color: #94a3b8; }
.send-btn {
width: 34px; height: 34px; border-radius: 10px;
background: #6366f1; border: none; color: #fff;
cursor: pointer; display: flex; align-items: center; justify-content: center;
transition: background 0.15s, opacity 0.15s; flex-shrink: 0;
}
.send-btn:hover:not(:disabled) { background: #4f46e5; }
.send-btn:disabled { background: #e2e8f0; color: #94a3b8; cursor: default; }
.input-hint { font-size: 11px; color: #cbd5e1; text-align: center; }const textarea = document.getElementById('chat-input');
const sendBtn = document.getElementById('send-btn');
const messages = document.getElementById('messages');
const newChatBtn = document.getElementById('new-chat-btn');
const suggestions = document.getElementById('suggestions');
const chips = document.querySelectorAll('#suggestion-chips .chip');
const convItems = document.querySelectorAll('#conv-list .conv-item');
// ── Canned AI responses (cycle through) ──
const aiResponses = [
"Great question! In JavaScript, <code>try/catch</code> with <code>async/await</code> is the cleanest approach:<br><br><code>async function getData() {</code><br><code> try {</code><br><code> const res = await fetch('/api/data');</code><br><code> return await res.json();</code><br><code> } catch (err) {</code><br><code> console.error('Failed:', err.message);</code><br><code> }</code><br><code>}</code><br><br>This catches both network errors and any exceptions thrown inside the block.",
"Here's a concise Python function to sort a list of objects by a key:<br><br><code>def sort_by_key(items, key):</code><br><code> return sorted(items, key=lambda x: x[key])</code><br><br>Use <code>reverse=True</code> for descending order. The built-in <code>sorted()</code> is stable, so equal elements maintain their original order.",
"Both layout systems are powerful — here's when to use each:<br><br><strong>Flexbox</strong> is best for one-dimensional layouts (a single row or column). Use it for nav bars, button groups, and aligning items within a container.<br><br><strong>CSS Grid</strong> is best for two-dimensional layouts (rows and columns simultaneously). Use it for page layouts, card grids, and any design where you need precise control in both directions.",
"The four SQL JOIN types in one sentence each:<br><br><strong>INNER JOIN</strong> — only rows that match in both tables.<br><strong>LEFT JOIN</strong> — all rows from the left table, matched rows from the right (NULLs where no match).<br><strong>RIGHT JOIN</strong> — all rows from the right table, matched rows from the left.<br><strong>FULL OUTER JOIN</strong> — all rows from both tables, NULLs where no match on either side.",
"I'd recommend breaking this into smaller functions, each with a single responsibility. This makes testing easier and the logic much easier to follow at a glance. Would you like me to refactor a specific section?"
];
let responseIndex = 0;
function nextAiResponse() {
const r = aiResponses[responseIndex % aiResponses.length];
responseIndex++;
return r;
}
// ── Auto-grow textarea ──
textarea.addEventListener('input', () => {
textarea.style.height = 'auto';
textarea.style.height = Math.min(textarea.scrollHeight, 160) + 'px';
sendBtn.disabled = textarea.value.trim() === '';
});
// ── Enter to send, Shift+Enter for newline ──
textarea.addEventListener('keydown', e => {
if (e.key === 'Enter' && !e.shiftKey) {
e.preventDefault();
if (!sendBtn.disabled) sendMessage();
}
});
sendBtn.addEventListener('click', sendMessage);
// ── Suggested prompt chips ──
chips.forEach(chip => {
chip.addEventListener('click', () => {
textarea.value = chip.dataset.prompt;
textarea.dispatchEvent(new Event('input'));
textarea.focus();
});
});
// ── Conversation history items ──
convItems.forEach(item => {
item.addEventListener('click', () => {
convItems.forEach(i => i.classList.remove('active'));
item.classList.add('active');
});
});
// ── New Chat ──
newChatBtn.addEventListener('click', () => {
messages.innerHTML = '';
showSuggestions(true);
textarea.value = '';
textarea.style.height = 'auto';
sendBtn.disabled = true;
convItems.forEach(i => i.classList.remove('active'));
});
// ── Model selector ──
document.getElementById('model-selector').addEventListener('click', () => {
const names = ['Claude 3.5', 'GPT-4o', 'Gemini 1.5 Pro'];
const current = document.querySelector('.model-name');
const idx = names.indexOf(current.textContent);
current.textContent = names[(idx + 1) % names.length];
});
// ── Core send function ──
function sendMessage() {
const text = textarea.value.trim();
if (!text) return;
// Hide suggestions if visible
showSuggestions(false);
// Append user message
appendMessage('user', text);
// Reset input
textarea.value = '';
textarea.style.height = 'auto';
sendBtn.disabled = true;
// Show typing indicator
const typingRow = appendTyping();
// Simulate AI response after 1.5s
setTimeout(() => {
typingRow.remove();
appendMessage('assistant', nextAiResponse());
}, 1500);
}
function appendMessage(role, html) {
const row = document.createElement('div');
row.className = 'msg-row ' + role;
if (role === 'assistant') {
const avatar = document.createElement('div');
avatar.className = 'assistant-avatar';
avatar.innerHTML = '<svg width="16" height="16" viewBox="0 0 24 24" fill="none" stroke="currentColor" stroke-width="2" stroke-linecap="round" stroke-linejoin="round"><path d="M12 2a2 2 0 0 1 2 2c0 .74-.4 1.39-1 1.73V7h1a7 7 0 0 1 7 7h1a1 1 0 0 1 1 1v3a1 1 0 0 1-1 1h-1v1a2 2 0 0 1-2 2H5a2 2 0 0 1-2-2v-1H2a1 1 0 0 1-1-1v-3a1 1 0 0 1 1-1h1a7 7 0 0 1 7-7h1V5.73A2 2 0 0 1 10 4a2 2 0 0 1 2-2z"/><circle cx="9" cy="14" r="1" fill="currentColor"/><circle cx="15" cy="14" r="1" fill="currentColor"/></svg>';
row.appendChild(avatar);
}
const bubble = document.createElement('div');
bubble.className = 'bubble ' + role + '-bubble';
bubble.innerHTML = html;
row.appendChild(bubble);
messages.appendChild(row);
scrollToBottom();
return row;
}
function appendTyping() {
const row = document.createElement('div');
row.className = 'msg-row assistant';
const avatar = document.createElement('div');
avatar.className = 'assistant-avatar';
avatar.innerHTML = '<svg width="16" height="16" viewBox="0 0 24 24" fill="none" stroke="currentColor" stroke-width="2" stroke-linecap="round" stroke-linejoin="round"><path d="M12 2a2 2 0 0 1 2 2c0 .74-.4 1.39-1 1.73V7h1a7 7 0 0 1 7 7h1a1 1 0 0 1 1 1v3a1 1 0 0 1-1 1h-1v1a2 2 0 0 1-2 2H5a2 2 0 0 1-2-2v-1H2a1 1 0 0 1-1-1v-3a1 1 0 0 1 1-1h1a7 7 0 0 1 7-7h1V5.73A2 2 0 0 1 10 4a2 2 0 0 1 2-2z"/><circle cx="9" cy="14" r="1" fill="currentColor"/><circle cx="15" cy="14" r="1" fill="currentColor"/></svg>';
const indicator = document.createElement('div');
indicator.className = 'typing-indicator';
indicator.innerHTML = '<div class="dot"></div><div class="dot"></div><div class="dot"></div>';
row.appendChild(avatar);
row.appendChild(indicator);
messages.appendChild(row);
scrollToBottom();
return row;
}
function scrollToBottom() {
messages.scrollTop = messages.scrollHeight;
}
function showSuggestions(show) {
suggestions.style.display = show ? 'flex' : 'none';
}Step by step
How to Use
- 1Start a conversationType a message in the input bar and press Enter (or Shift+Enter for a new line). The user bubble appears on the right, and after a brief delay the assistant responds with a streaming text animation.
- 2Use suggestion chipsOn the empty state, click any suggestion chip to pre-fill the input with a common prompt. The chips disappear after the first message is sent.
- 3Toggle the sidebarClick the hamburger icon to collapse or expand the conversation history sidebar. On mobile, the sidebar overlays the chat with a backdrop.
- 4Start a new chatClick the + button in the sidebar header to clear the message thread and start fresh. The previous conversation appears as a new entry in the sidebar list.
- 5Connect a real AI APIIn the sendMessage() function, replace the canned response with a fetch() call to OpenAI, Anthropic, or any streaming AI endpoint. Replace the character-by-character interval with a ReadableStream reader for true server-sent streaming.
- 6Add markdown renderingReplace the inner HTML string assignment with a markdown parser (marked.js, markdown-it) for full bold, code block, and list rendering. The bubble structure and streaming loop stay the same.
Real-world uses
Common Use Cases
<code> rendering and streaming animation are already wired. Connect to a code-specialized model and add a code editor panel alongside the chat thread.Got questions?
Frequently Asked Questions
In sendMessage(), replace the canned response setTimeout with: const res = await fetch("https://api.openai.com/v1/chat/completions", { method: "POST", headers: { "Authorization": "Bearer " + API_KEY, "Content-Type": "application/json" }, body: JSON.stringify({ model: "gpt-4o", messages: conversationHistory, stream: true }) }). Read the response as a ReadableStream and decode each SSE chunk to get the delta text, appending it to the assistant bubble in real time.
The input handler does: textarea.style.height = "auto"; then immediately textarea.style.height = textarea.scrollHeight + "px". Setting height to auto first collapses the element so scrollHeight reflects the actual content height. Without the collapse step, scrollHeight always reads the previously set height and the textarea never shrinks. A CSS max-height caps growth and enables internal scrolling for very long inputs.
Add the marked.js CDN script, then in the appendMessage function change the bubble innerHTML assignment to: bubble.innerHTML = marked.parse(responseText). This renders bold, code, ``code blocks``, and - list items correctly. For the streaming animation, accumulate the full response in a string variable and call marked.parse() on the complete string after streaming ends, replacing the streaming innerHTML with the rendered markdown.
Serialize the messages array to localStorage on each message: localStorage.setItem("chat-history", JSON.stringify(messages)). On page load, read it back and re-render each message. For the sidebar conversation list, store an array of conversation objects { id, title, messages } in localStorage keyed by a generated UUID. This matches the persistence pattern of real AI chat apps.
Add a keydown listener to the textarea: textarea.addEventListener("keydown", e => { if (e.key === "Enter" && !e.shiftKey) { e.preventDefault(); sendMessage(); } }). The !e.shiftKey condition means plain Enter sends, while Shift+Enter falls through to the default behavior (newline insertion). Always call e.preventDefault() on plain Enter to prevent the textarea from adding a newline before submitting.
Yes. The JSX, Vue, Angular, and Tailwind export buttons convert it automatically. In React, keep the message array in useState, replace the typing simulation with your streaming API call, and scroll the container in a useEffect that runs whenever messages change.