Source Code
<div class="stage" id="stage">
  <div class="spotlight" id="spotlight"></div>
  <div class="content">
    <h1>Follow the light</h1>
    <p>Move your cursor anywhere on this panel to control the spotlight. The rest stays in the dark.</p>
    <div class="cards">
      <div class="item">🚀 Performance</div>
      <div class="item">🎨 Design</div>
      <div class="item">⚡ Speed</div>
      <div class="item">🔒 Security</div>
      <div class="item">🌐 Global CDN</div>
      <div class="item">📱 Responsive</div>
    </div>
  </div>
</div>
* { box-sizing: border-box; margin: 0; padding: 0; }
body { font-family: system-ui, sans-serif; }
.stage {
position: relative;
min-height: 100vh;
background: #030712;
display: flex; align-items: center; justify-content: center;
overflow: hidden;
cursor: none;
}
.spotlight {
position: absolute;
width: 400px; height: 400px;
border-radius: 50%;
background: radial-gradient(circle, rgba(255,255,255,0.07) 0%, transparent 70%);
transform: translate(-50%, -50%);
pointer-events: none;
transition: left 0.05s, top 0.05s;
top: 50%; left: 50%;
}
.content {
position: relative; z-index: 1;
text-align: center; padding: 40px 24px;
display: flex; flex-direction: column; align-items: center; gap: 24px;
max-width: 600px;
}
h1 { font-size: clamp(28px, 5vw, 48px); font-weight: 800; color: #f1f5f9; letter-spacing: -0.5px; }
p { font-size: 14px; color: #334155; line-height: 1.7; max-width: 400px; }
.cards { display: flex; flex-wrap: wrap; gap: 10px; justify-content: center; }
.item {
padding: 10px 18px; font-size: 13px; font-weight: 500;
background: rgba(255,255,255,0.04);
border: 1px solid rgba(255,255,255,0.06);
border-radius: 50px; color: #334155;
transition: color 0.2s, border-color 0.2s;
}const stage = document.getElementById('stage');
const spot = document.getElementById('spotlight');
stage.addEventListener('mousemove', e => {
const rect = stage.getBoundingClientRect();
spot.style.left = (e.clientX - rect.left) + 'px';
spot.style.top = (e.clientY - rect.top) + 'px';
});Learn Coding Visually
Learn to code with interactive, live-preview playgrounds — HTML, CSS, JavaScript, React & more.
 HTML Playground42 lessons · Click-based · Live preview
 CSS PlaygroundLearn CSS with a live editor
 JavaScript Playground60 lessons · DOM · Async · Canvas
 React PlaygroundLearn React with a live code editor
 GSAP PlaygroundLearn GSAP animation interactively
 SVG Playground44 lessons · shapes · paths · animation
 SCSS Playground45 lessons · Sass modules · tokens
 Tailwind PlaygroundLearn Tailwind CSS with a live editor
 Bootstrap 5 Playground50 lessons · live preview
Spotlight Effect — Free HTML CSS JS Snippet
Spotlight Effect · Animations · Plain HTML, CSS & JS · Live preview
What's included
Features
About this UI Snippet
Spotlight Effect — Mouse-Tracked Radial Gradient & cursor: none Stage
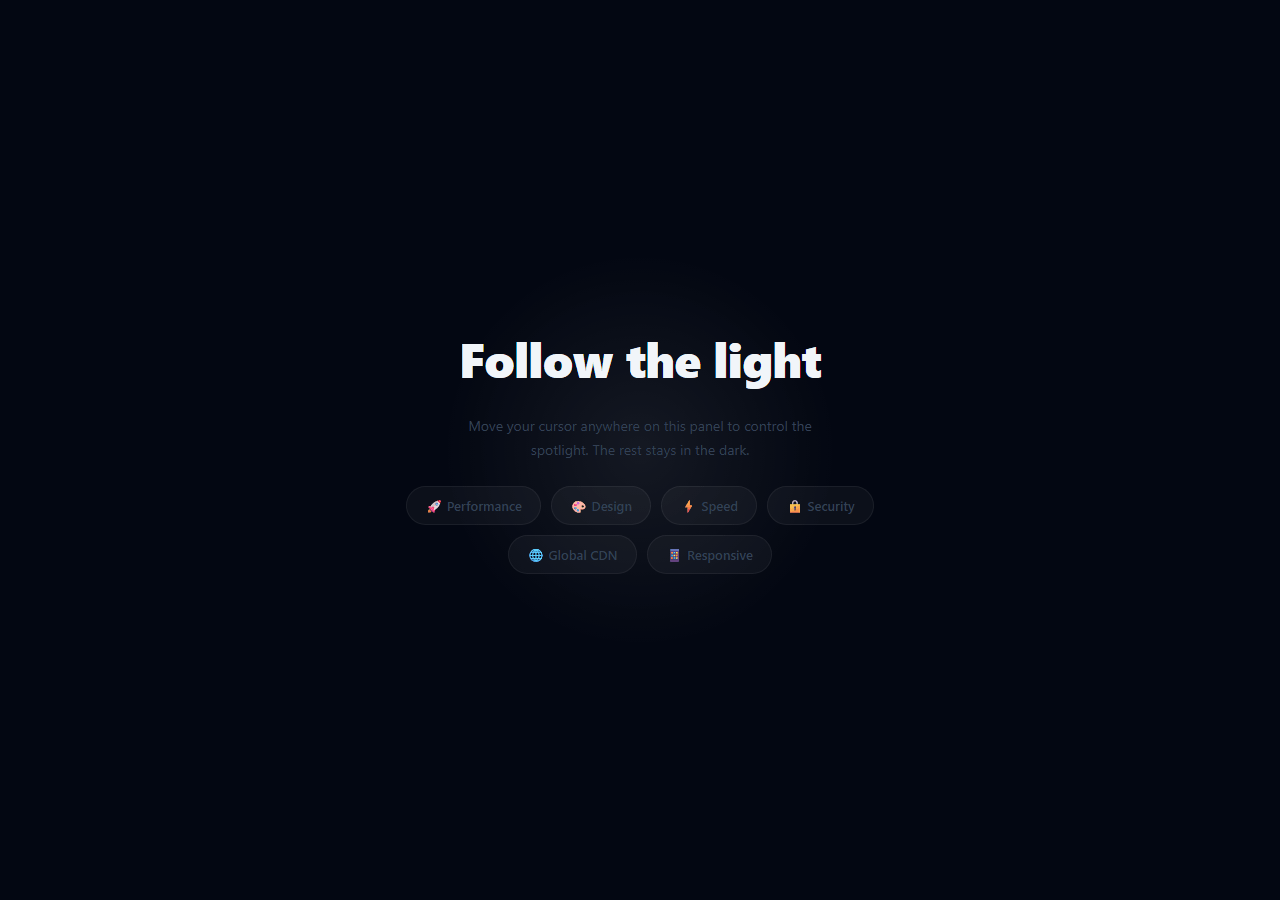
The spotlight effect hides the cursor and replaces it with a glowing circle that illuminates the content beneath — like a theatre spotlight following an actor across a dark stage. It uses the same cursor-hiding technique as the custom cursor and the mouse-tracking of the 3D card tilt. It creates an intimate, discovery-driven interaction where users reveal content by moving their cursor.
How the spotlight tracks the cursor
The mousemove handler reads getBoundingClientRect() on the stage container and subtracts the container offset from the cursor coordinates: spot.style.left = (e.clientX - rect.left) + 'px'. This gives the cursor position relative to the stage rather than the viewport. The spotlight div is centred on this position using transform: translate(-50%, -50%).
The radial gradient hole
The spotlight div has background: radial-gradient(circle, rgba(255,255,255,0.07) 0%, transparent 70%) — a faint white glow at the centre that fades to transparent. The effect is subtle by design: it illuminates just enough to make content readable without appearing as a solid circle.
cursor: none on the stage
cursor: none on the stage element hides the OS cursor. The spotlight div with pointer-events: none becomes the visual cursor replacement. Without pointer-events: none, the spotlight would intercept all mouse events.
The transition smoothing
transition: left 0.05s, top 0.05s adds a tiny 50ms lag to the spotlight position. Without it the spotlight position is perfectly synchronised with the cursor — which actually looks less natural. The slight delay creates a smooth trailing feel.
The radial gradient mask
The spotlight uses background: radial-gradient(circle 180px at X Y, transparent 0%, rgba(0,0,0,0.85) 100%) on an overlay div. The circle centre (X Y) updates to the mouse position on each mousemove event. The transparent centre creates the "lit" area, and the dark edges create the "dark room" effect. The gradient size (180px) is the spotlight radius — increase for a wider spotlight, decrease for a focused beam.
Mouse coordinate conversion
The overlay covers the full container using position: absolute; inset: 0. Mouse coordinates from mousemove are relative to the viewport (e.clientX, e.clientY). These must be converted to coordinates relative to the overlay: const rect = overlay.getBoundingClientRect(); const x = e.clientX - rect.left; const y = e.clientY - rect.top. These are then formatted as CSS background-position values.
The reveal-on-hover pattern
The overlay has opacity: 0 by default, fading in on mouseenter to opacity: 1. This means content appears normal until the user's cursor enters the spotlight zone, creating a discovery interaction — users naturally explore by moving their cursor.
Combining with other effects
Pair this snippet with the Aurora Background or Floating Particles animations for a layered effect. The spotlight sits on top (higher z-index) and reveals the animated background beneath through its transparent centre.
Build with AI
Build, Understand, Optimize, and Extend It With AI
You don't need to work out the cursor-hiding and coordinate-conversion logic by hand. Paste this snippet's HTML, CSS, and JS into an AI coding assistant like Claude and ask it to explain exactly why cursor: none is paired with pointer-events: none on the spotlight div, or why getBoundingClientRect is needed to convert clientX and clientY into stage-relative coordinates instead of using the raw event values directly. The same assistant can help optimize it, for example checking whether setting style.left and style.top directly on every mousemove event (rather than a transform) is the best-performing approach, or whether a requestAnimationFrame-throttled update would smooth things out on a lower-end device. It's also useful for extending the feature: ask it to make the spotlight radius pulse subtly on its own, reveal different content depending on which card the spotlight currently overlaps, or add a graceful fallback for touch devices where mousemove never fires. Treat the code less like a finished artifact and more like a starting point for a conversation.
Prompt to recreate it
Copy this into your AI assistant of choice to build the effect from scratch, or as a jumping-off point for your own variant:
Build a mouse-tracked spotlight reveal effect in plain HTML, CSS, and JavaScript, no libraries.

Requirements:
- A full-height dark stage container with cursor: none so the operating system's cursor is hidden while inside it, holding a centered content block (a heading, a paragraph, and a row of small pill-shaped items).
- A separate circular spotlight element, positioned absolutely, sized a few hundred pixels across, filled with a radial gradient that is a faint, low-opacity light at its center fading to fully transparent well before its edge — the glow must be subtle, not a solid visible circle.
- The spotlight element must have pointer-events: none so it never blocks or intercepts mouse events meant for the content underneath or the stage itself.
- On mousemove over the stage, compute the cursor's position relative to the stage (not the viewport) using getBoundingClientRect, and set the spotlight's left and top styles to that position, then use a CSS transform of translate(-50%, -50%) so the spotlight is centered on the cursor rather than offset by its own top-left corner.
- Add a very short CSS transition (a few dozen milliseconds) on the position properties so the spotlight trails the cursor with a barely perceptible smoothing lag rather than snapping instantly to each mousemove event.
- As a documented fallback in a code comment, describe how to detect a touch-only device (for example via a pointer: coarse media query) and either disable cursor: none and show the spotlight at a fixed position, or hide the spotlight effect entirely, since mousemove never fires on touch.
Want to tighten it up first? Run this prompt through the AI Prompt Studio to score it across 8 quality dimensions, catch anti-patterns, and tune the wording for Claude, ChatGPT, or Gemini before you paste it in.
Step by step
How to Use
- 1Move the cursor in the previewMove the cursor around the dark stage. The cursor is hidden and replaced by a glowing circle that illuminates the content beneath it.
- 2Change the spotlight sizeUpdate width: 400px and height: 400px on .spotlight in the CSS panel.
- 3Change the glow brightnessUpdate rgba(255,255,255,0.07) on the radial-gradient. Higher values (0.15-0.25) create a brighter spotlight.
- 4Change the glow colourReplace rgba(255,255,255,...) with any colour — rgba(99,102,241,...) for an indigo spotlight, rgba(236,72,153,...) for pink.
- 5Change the transition smoothingUpdate 0.05s on transition: left/top. Higher values (0.15s) give more trailing; 0s gives instant response.
- 6Export in your formatClick "HTML" for a standalone file, "JSX" for a React component, or "Tailwind" for a React + Tailwind version.
Real-world uses
Common Use Cases
Got questions?
Frequently Asked Questions
getBoundingClientRect() gives the stage top-left corner. Subtracting rect.left and rect.top from e.clientX/clientY gives the cursor position relative to the stage. Setting spot.style.left/top to these values moves the spotlight. transform: translate(-50%, -50%) centres the 400px orb on the cursor.
cursor: none hides the default OS cursor within the stage element. The spotlight div visually replaces the cursor. pointer-events: none on the spotlight ensures mouse events pass through it to the content beneath.
Increase the rgba alpha value in radial-gradient: rgba(255,255,255,0.07) to rgba(255,255,255,0.2) for a brighter glow, or rgba(255,255,255,0.35) for a strong spotlight.
Replace rgba(255,255,255,...) with any colour in rgba format: rgba(99,102,241,0.15) for an indigo glow, rgba(236,72,153,0.15) for pink. The colour blends with the content behind it.
The spotlight requires a mousemove event which does not fire on touch devices. For mobile, remove cursor: none and show the spotlight at a fixed position (e.g. centre of the stage) or hide it entirely with @media (pointer: coarse).
Yes. Click "JSX" for a React component. In React, attach onMouseMove to the stage div. Use useRef for the spotlight element to directly set style.left/top without causing rerenders on every mouse move.